Today I worked on the underlining, but I did not finish. I still need to cut the upper bust cups and do those. I thought for sure I had done them, but I can't find them anywhere, so maybe I didn't. I'm going to keep looking before I cut them out again though!
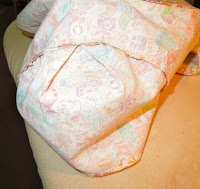
After you pin the under lining pieces to the fashion fabric, you rough cut around the edges and then baste the pieces together on the seam lines. I tried to make sure that the X where there is an intersection of seams would show on the right side. I really do like using the silk thread for doing this. You can't see the thread very well on the muslin side because of the color I chose, but it shows up well enough on the print side. On the photo below, the first side is pinned and the next one is partially basted. The picture at the bottom shows the right side of the fabric with the basting.
Saturday, July 21, 2012
Bombshell - Underlining
Posted by Nancy Winningham at 5:28 PM 0 comments
Bombshell - another muslin??
These are the changes that I made to the cups after marking them and taking them off of the bra.
Posted by Nancy Winningham at 5:33 AM 0 comments
Tuesday, July 17, 2012
Bombshell part 3 - Getting the muslin right
 This seemed like it would work, but I need to try it on. My dress form is not exactly my shape, so I wanted to try this thing on my real body to make sure.
 - Keep the size 36 lower bodice
- add 1/2 inch to the top of the lower cups and the bottom of the upper cup for a total increase of 1”
- Used a marking pen to add to the sides and center front of the cups. A total of about one to one and a half inches.
- I also added to the lower portion of the cups which also changed the shape of the cups. I sewed these changes in by hand and marked them with a marker after they were sewn. (Unfortunately, I did not use permanent marker, so you can see where the ink spread when I turned my iron upside down to press a curve and water spilled out!)
- I also took a small dart in the outer part of the upper cup. I was having a little gapping there.
- I pinned out almost an inch in the back that I all remove by making a sway back alteration to the back pieces.
- I may also have to take a little out of the side back seams, but I will be able to do that after all the layers are put together.
Posted by Nancy Winningham at 2:03 PM 0 comments
Monday, July 16, 2012
Bombshell part 2 - muslin
This evening I decided to try to put my muslin together. With anything this fitted, it is always a challenge. I never really know what size to start with, so I decided on a 36 for the bodice and 38 for the skirt. I knew I would need to do a FBA. It is frustrating and discouraging when I have to keep lowering the bust point!! Age and gravity are not always my friends ;-/
At first I thought I would need to shorten the waist and raise the center front. I think the line for the cup is wide enough. But, now that I think about it, I need to lower the curve of the cups. this may be a little tricky, so I'm waiting until tomorrow to tackle this. I think I will need daylight and a few cups of coffee to dive into this.
Posted by Nancy Winningham at 11:15 PM 0 comments
Bombshell - getting started
 I have done some other sewing lately. I made a dress out of the NL 6104 pattern, but I’m not that thrilled with it. I’ll wear it at home, but probably not anywhere else. It feels kind of frumpy to me.
 Posted by Nancy Winningham at 11:01 PM 3 comments
Sunday, July 08, 2012
New Look 6104 - anything but boring
Well, about a week ago I made a pair of shorts and then discovered that I had NO tops that would go with them. I saw this pattern in my little box of "to-do soon" patterns and grabbed the piece of linen in the color called "chardonnay"
This top took me a little longer than I thought, but I really enjoyed making the front tucks and the other details that took a little longer on this top. The smallest size this pattern comes in is a 10, but I really need an 8 or smaller across the shoulders. (Before you start thinking, "Oh, she's so tiny" let me remind you that I am doing a FBA and grading out to a 14 in the hip. I just have tiny shoulders apparently.) I am really happy with the fit on this, so I immediately started thinking about making it again.
As you can see at the left, I also changed the button placement on this one. Wow - I'm really stepping out of the box now (LOL) Also, I turned the bias binding completely in to the inside instead of wrapping it around the top. Not because I was being creative, but because I didn't read the directions very well! Because of this wider binding, I used two rows of topstitching around the neck and armholes.
I decided to look at some reviews on PR and got inspired by one review in particular. Look at what this clever girl did with this pattern!! This is from a review by ACBrown28. She has some interesting details about this pattern on her blog (and she's a funny writer too!)

Anyway, I was very inspired by her versions and went on to version 2.
For this version I used a piece of cotton I had picked up last year from Beverly's. They mostly sell quilting cotton, but this piece is a bit lighter weight and has a nicer hand and drape. I bought it to make something for my daughter, but she hated the print. I like it.
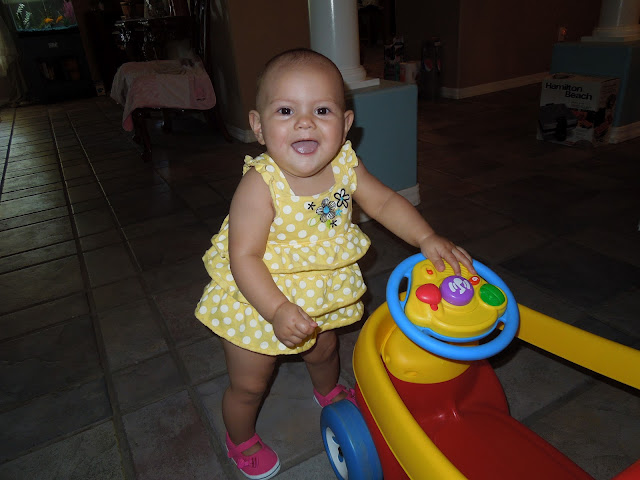
(Oh, in case you're wondering what in the world I have in my hand, there is actually the most beautiful baby in the world sitting on a little car at the end of that handle. Not that I'm biased or anything.)
On this version I added a neck ruffle and cap sleeves (both included in the pattern)
 I like the sleeves because they have a little pleat and nice shape.
I also added a casing for waist elastic. I used bias tape and 1/4" elastic. Next time I need to move the elastic down about 3/4" Next time? Yes, there will be a next time. I also discovered on version one that I could easily slip this over my head and did not need the button front. So, version 2 here has a fake placket down the front and those buttons do nothing but adorn the blouse. They aren't really the buttons I wanted to use, but since I just had foot surgery, I couldn't run to the store to get something else. It's all about stash-diving right now!
Parting shot: I just had foot surgery on both of my feet less than two weeks ago. Even though I have to keep my feet up a lot, I'm still finding time to sew! When I'm not sewing, this little Emma keeps me entertained!
Posted by Nancy Winningham at 4:35 PM 5 comments
Saturday, July 07, 2012
Fabric Shopping in Uganda
Every year that I go to Uganda, I spend the first day looking for fabric that I will be using with the ladies. There are hundreds of designs to choose from, but only a couple of types of fabric to buy.
 |
| The woman in this picture is wearing a Kitenge |
- Kitenge fabric (not sure of the spelling on that!) This is what I usually buy in Uganda. It is akin to quilting weight cotton - bad quilting cotton. When you buy the fabric it has some kind of glaze on it and it is stiff as a board. There is no way to tell the texture of the fabric. This comes in 6 meter lengths. Sometimes you get a nicer weight cotton, sometimes it is just bad quilt weight, and sometimes it is as heavy as home dec. No way to tell. I think I paid 35000 Ugandan schillings for a length, which is a little less than $15.00. The woman in the picture on the left is wearing a Kitenge. These dresses come in lots of styles, but they can be one or two piece and usually fit close to the body in the top half. They can be sleeveless or short sleeved.
- "apron" fabric. They don't call it that, but that's what they use it for. The ladies often will wrap this fabric around themselves to keep their dress clean. This is a lighter weight fabric and usually is polyester or a poly/ cotton blend. It is usually sold in 4 meter lengths.
Polyester charmeuse. They use this a lot for the "Gomez" which is the traditional Ugandan dress. Sometimes you will see the Gomez made from cotton. The two ladies on the floor in this picture are wearing the Gomez. You can also see how several of them have the fabric wrapped around like aprons.
- poly/cotton broadcloth - they use this to make school uniforms and to line the Kitenges.
- On my last visit, there was some silk in one of the shops, but I was already out of money by that point, so I didn't even ask how much it was. Next year I'll be checking that out.
- I didn't have time to look this year, but we also walked by some places with beautiful sequined sari fabrics. There are a lot of muslim and Indian people in Uganda.
Also, this year, in the city of Kampala, we hit a little fabric heaven. We found a fabric mall!! I'm not kidding - a whole row of shops (probably 20) of all fabric shops. This was under the street. I'm definitely going back there next year. Also, the fabric was only 25000 at one of the shops there, so that would be only about $1.75 a yard. We did buy some fabric there, but one of the other ladies has it and I don't think she has washed it yet to see what it is like. Click on these photos to enlarge and see the beautiful fabrics.
 |
| The woman on the right helped Bea (the one on the left) pick fabrics for her Gomez. |
 |
| A little bit of fabric heaven |
 |
| Most of these fabrics are for Gomez |
 |
| You can see the Gomez fabric on the left and right. Kitenge fabrics are farther back in this store |
 |
| This was my favorite shoe. Look at all that Kitenge fabric!! |
Posted by Nancy Winningham at 2:46 PM 9 comments


