Saturday, November 29, 2014

Loes Hinse Ascona Pant take 2

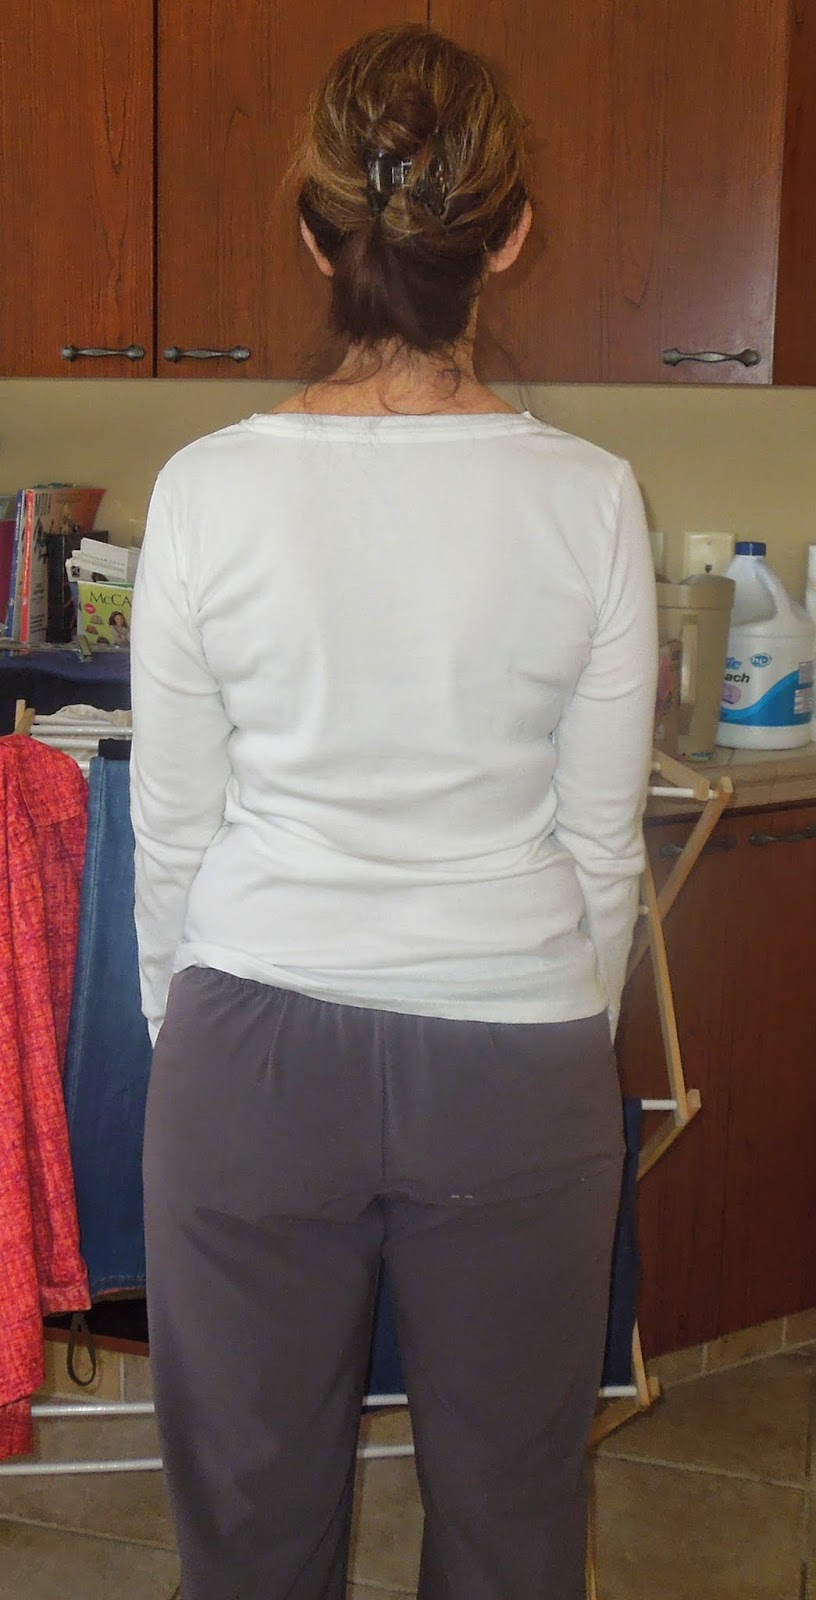
On this version, I made a size smaller, took a dart at the butt, and adjusted the waist line.  Well, I think I should have added a LOT more to the back.  Let's just say, these pants aren't going out in public if there's even the smallest chance that I may sit down!!
Other than that, the fit is much better.


This time I used 1.5" elastic using a waistband trick taught to me by Loes Hinse in her shop one day.  Use 1.25 - 1.5" elastic and serge the end as usual.  After turning, only stitch at the 1" line, leaving 1/2" free.  This gives a flatter waist for those with a bigger difference between waist and hip.  It works for me.


The problem with these pants is that once I decided to use wider elastic and take a 1/2" dart at the CB, this lowered the waist too much and I did not compensate for it.  I'll have to donate these to a lady plumber!  They say the third time is a charm, so I hope so!  I like using the 1.5" elastic as opposed to the 1" elastic.  And a word about doing the elastic.  I love Loes's way of serging the elastic to the waistband, turning, and stitiching.  The PROBLEM with doing it this way is that you have no way to adjust the waist band after you try it on!!   Also, depending on your elastic, serging the end may stretch the elastic to a bigger size that does not retract!!   I DO have a solution.

  1. First, try the elastic on at the height you want to wear the pants.  Pin it with a safety pin.  Leave it on
  2. Put the pants on and and pull them up under the elastic and then fold over so that the waist edge of the pants now meets the bottom edge of the elastic.  Check the fit.
  3. Change your serger to a longer stitch length.  I have an old serger, so I used the longest stitch length I could get.  This helps prevent the elastic from stretching out on the stitched edge.
  4. Do NOT use non-roll elastic.  This seems to stretch out the worst.  Use a good quality elastic.  I buy mine from Peggy Sagers.  You have to buy a lot, but the great thing is that you can cut it to any width you like.  
  5. Turn your waist over and stitch as per pattern directions or as above.  If you have not much difference between waist and hip, then use the directions in the pattern.  If you have bigger hips and a smaller waist, you may want to try the method I described above.
Another thing I did differently from the pattern is that I added a piece of twill tape to the rear seam to keep it from bagging out.


This pair of Asconas is a little tighter than the last because there is not much stretch as compared to the RPL I used last time.    As you can see, the fit in the butt is a lot better than the first pair.  It would be even better if I had on different underwear!!

Because there is little crosswise stretch in this fabric, these are a little too tight in the legs. 

 Now I'm anxious to try pair # 3!


Friday, November 28, 2014

Loes Hinse Ascona Pant take 1

I got this pattern over a month ago, and have been really wanting to make it, but life keeps getting in the way.  Well, I finally got the time and got up the nerve to cut into some RPL that I've had for a long time.  I didn't really have anything to muslin these pants, so I had to just give it a shot.

  1. I went by pattern measurements and decided to cut a medium, which is a 40" hip.  I made it as is with no changes.  Blech!
  2. This came out TOO BIG.  Well, I'm not sure if everything is too big, but it is supposed to b e a lowered waist and it came all the way to mine.  Also, the waist was as big as the hips (even with the tiny darts in the back) so there were major gathers at the waist.  I really didn't want a pant that came to my waist, so I cut off the whole waistband, which lowered the waist by a little more than 2"  I've made that adjustment on my pattern, plus will take an additional 1" off the front
  3. Even with this change, there is still the problem of major baggy butt.
  4. So, remembering all of the Peggy Sager's webcasts on pants, I took a dart across the seat, really thinking this would NOT help, but being the obedient seamstress that I am, I decided to try it anyway.  Well, as you can see in this picture, the side on the right, which I pinned, is much better than the left.  Now I've made this adjustment on the pattern as well.
  5. The pants still seem to big in the legs (and I've got big legs!)  I was really expecting them to be much narrower at the hem.  I've traced the smaller size onto my pattern, but not sure if I want to cut it yet.  I still have enough of this fabric left to make another pair, so I don't really have anything to lose.  The pattern said it would take 1-7/8 yards of 60", but my fabric was only 58" and I was able to squeeze it into 1.25 yards!  Now that's what I like!
We're going over to friends' for dinner, and since I'm making some of the food, I don't think pair number two will get cut out tonight.  Could I possible get lucky enough to get some sewing in two days in a row?  

I haven't gotten to sew much, but I have done some crochet.  The good thing about crochet is that it is so portable and can be done just about anywhere.  I made this awesome scarf and I just love it.  The yarn is Pediboo by Frog tree and it is super soft.  I love it!