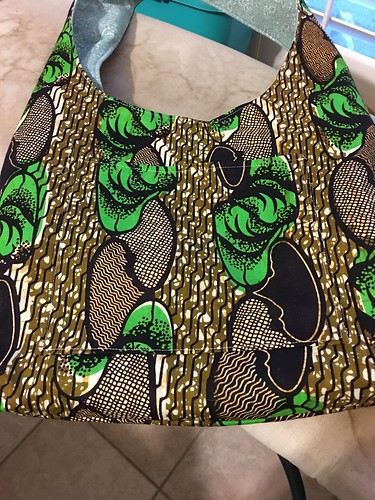
At the end of this month I am making another mission trip to Uganda. It has been over 2 years since I've been there, so I'm anxious to go! THis year I am going with another friend named Kathryn. I've been trying out different things to teach the ladies to sew. The challenge is always that I never know how many women will be there, how many days each one will be there, and the fact that the treadle machines don't work half the time, if we have them at all! So, I decided that we need a project to make with just hand sewing while they take turns using the sewing machine. On the machines I think we will be making this bag.

There are a few things I will change, but it's a pretty simple pattern. I added a pocket on mine, and if I make another one for myself, I will make pockets on the lining. Kathryn is not a sewer, so she will be my guinea pig as to whether this will be a good project to make!
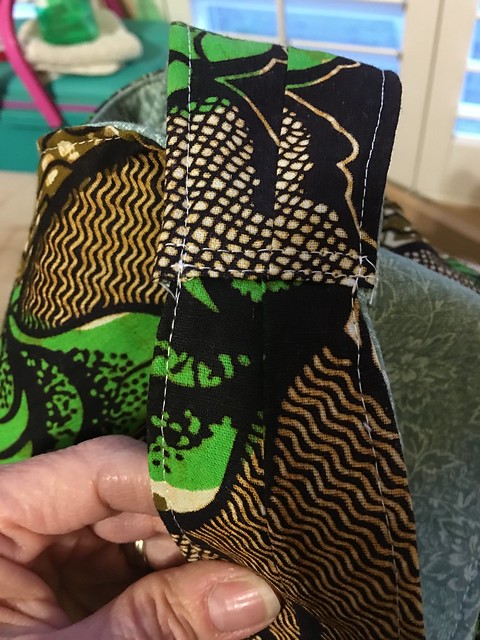
I'm not really happy with the way the handle is put together, I didn't do the best job, I've done shoulder straps like this before, and they never look very neat. But for our purposes, I think it will be good enough.
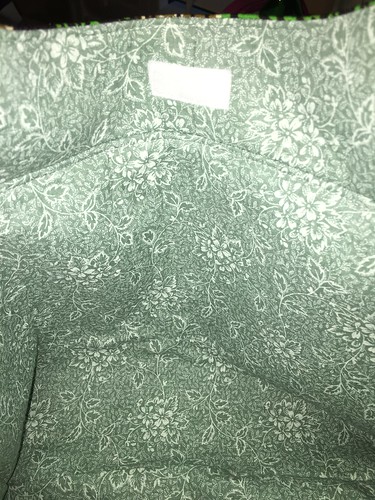
The lining has a velcro closure, which is fine.
All in all, it's not too bad of a bag. I'm thinking it will be great for carrying around knitting projects, but I will have to exchange that velcro for a snap. Yarn always snags on velcro
Saturday, January 02, 2016
Preparing for Uganda
Friday, August 28, 2015
Minimalist Wardrobe or Wardrobe simplified - Concepts
 |
| found on pinstripeandpearls.com |
If you go on Pinterest and search "minimalist wardrobe", you will get hundreds of results. Now that I am no longer a slave to the clock (aka retired), my lifestyle is different, and my wardrobe needs have changed. But, working or not, minimalism is a reality that many of us are beginning to embrace. Less is more (I'm trying to learn) Granted, I'm not ready to whittle down to the bare minimum in clothes, 2 pairs of shoes, and go live in a "tiny house", but I find all of those things inspiring.
I live in a relatively big house, stay active, and love to travel. This means that I want to keep things as simple as possible. This means that I need to get rid of A LOT of STUFF! I've noticed that I have certain favorite things that I wear over and over again. I also have a few things that I want to grab, but never seem to have in my closet. Of course, it is summer, and clothing needs will be different in the winter. We basically only have 2 seasons here: summer, and a fallish-winter.
So first, the things I wear all the time (this summer)
- capri jeans
- beige denim shorts
- *black hand-sewn cotton jersey skirt
- *black and white yoga skirt
- white knit short sleeved top
- chambray long sleeved shirt
- *orange 3/4 sleeve "Now" shirt
- *red linen dress
- *black rayon simple dress
- *floral linen simple dress
- *linen gauchos/coulottes
- white sleeveless top
- black sleeveless top
- lightweight jacket
- another comfortable dress (my red linen one has about bit the dust.)
 |
| found on buzzfeed.com |
Tuesday, July 28, 2015
Cupcake Wars
 This summer I've decided that I want to find the perfect cupcake recipe. This is not so good for the waistline, but I have to say the DH is pretty happy about testing these out!
Last week I made some amazing lemon cupcakes, but did not take any pictures. I will have to make those again now that I have something to compare with and post on the blog.
This morning I made what I'm calling Nancy's Simple Vanilla Cupcakes. OK, not so original, but it will help me keep track of the recipes! I looked at several recipes, found what was the same in each, and then adapted the amounts in the other ingredients. (Same thing for the frosting.)
 Nancy's Simple Vanilla Cupcakes
3/4 cup sugar
2 xlg or jumbo eggs (we buy local and organic, so it's hard to judge the size.)
2 tsp. pure vanilla extract
1-1/2 cups all-purpose flour
1 tsp. baking powder
1/4 tsp. salt
2/3 cup milk ( some recipes said "cold", others "room temp". Mine was close to room temperature.
- Preheat oven to 350°F and line 12 cupcake tins with paper liners.
- Using an electric mixer (or by hand), cream butter and sugar until light and fluffy. Add eggs one at a time and beat after each.
- Add vanilla and milk
- mix dry ingredients in a separate bowl, and add slowly to mixer bowl.
- beat until smooth.
- Use icecream scoop to fill 12 muffin tins 2/3-3/4 full
- Bake at 350°F 15-20 minutes, or until slightly golden, and knife inserted in the middle comes out clean. (I used convection, so it only took 10-12 minutes.)
- Let cool in pan about 5 minutes then transfer to wire rack to cool
- When completely cool, top with Amazing Cream Cheese Frosting
- 8oz package cream cheese
- 1 stick (1/2 c.) softened butter
- 2-4 cups powdered sugar (I used about 3)
- 1 tsp. pure vanilla extract
- cream together cream cheese and butter.
- add vanilla
- Gradually add in powdered sugar until you have the desired consistency. I used about 3 cups
- put about 1/3 of the frosting in a pastry bag and cut off the tip (I have these, but I'm sure you could use a quart size ziplock and cut off one corner. The pastry bags are really worth it though IMHO)
- Squeeze frosting onto the top of each cupcake (I used about 2/3 of the frosting I made. I put the rest in another pastry bag and used a rubber band to close the open end. This will keep in the refrigerator for a couple of weeks. Let it come to almost room temp and knead it before using again)
- Top with colored sugar or sprinkles if desired.
Friday, June 26, 2015
Shirr Delight
I solved my shirring problems, and this is how...
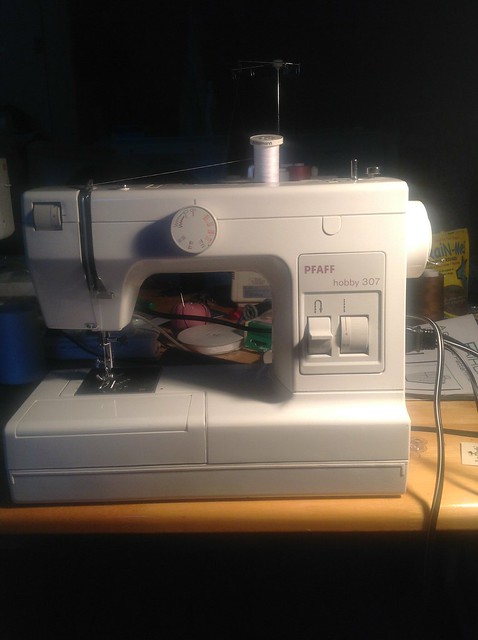
I bought this machine online several months ago online and was really disappointed. It had missing prices, broken parts, and was lopsided. I fixed what I could and put it aside. Well, I pulled this baby out, loaded a bobbin with elastic thread and did a test run. Perfect results!

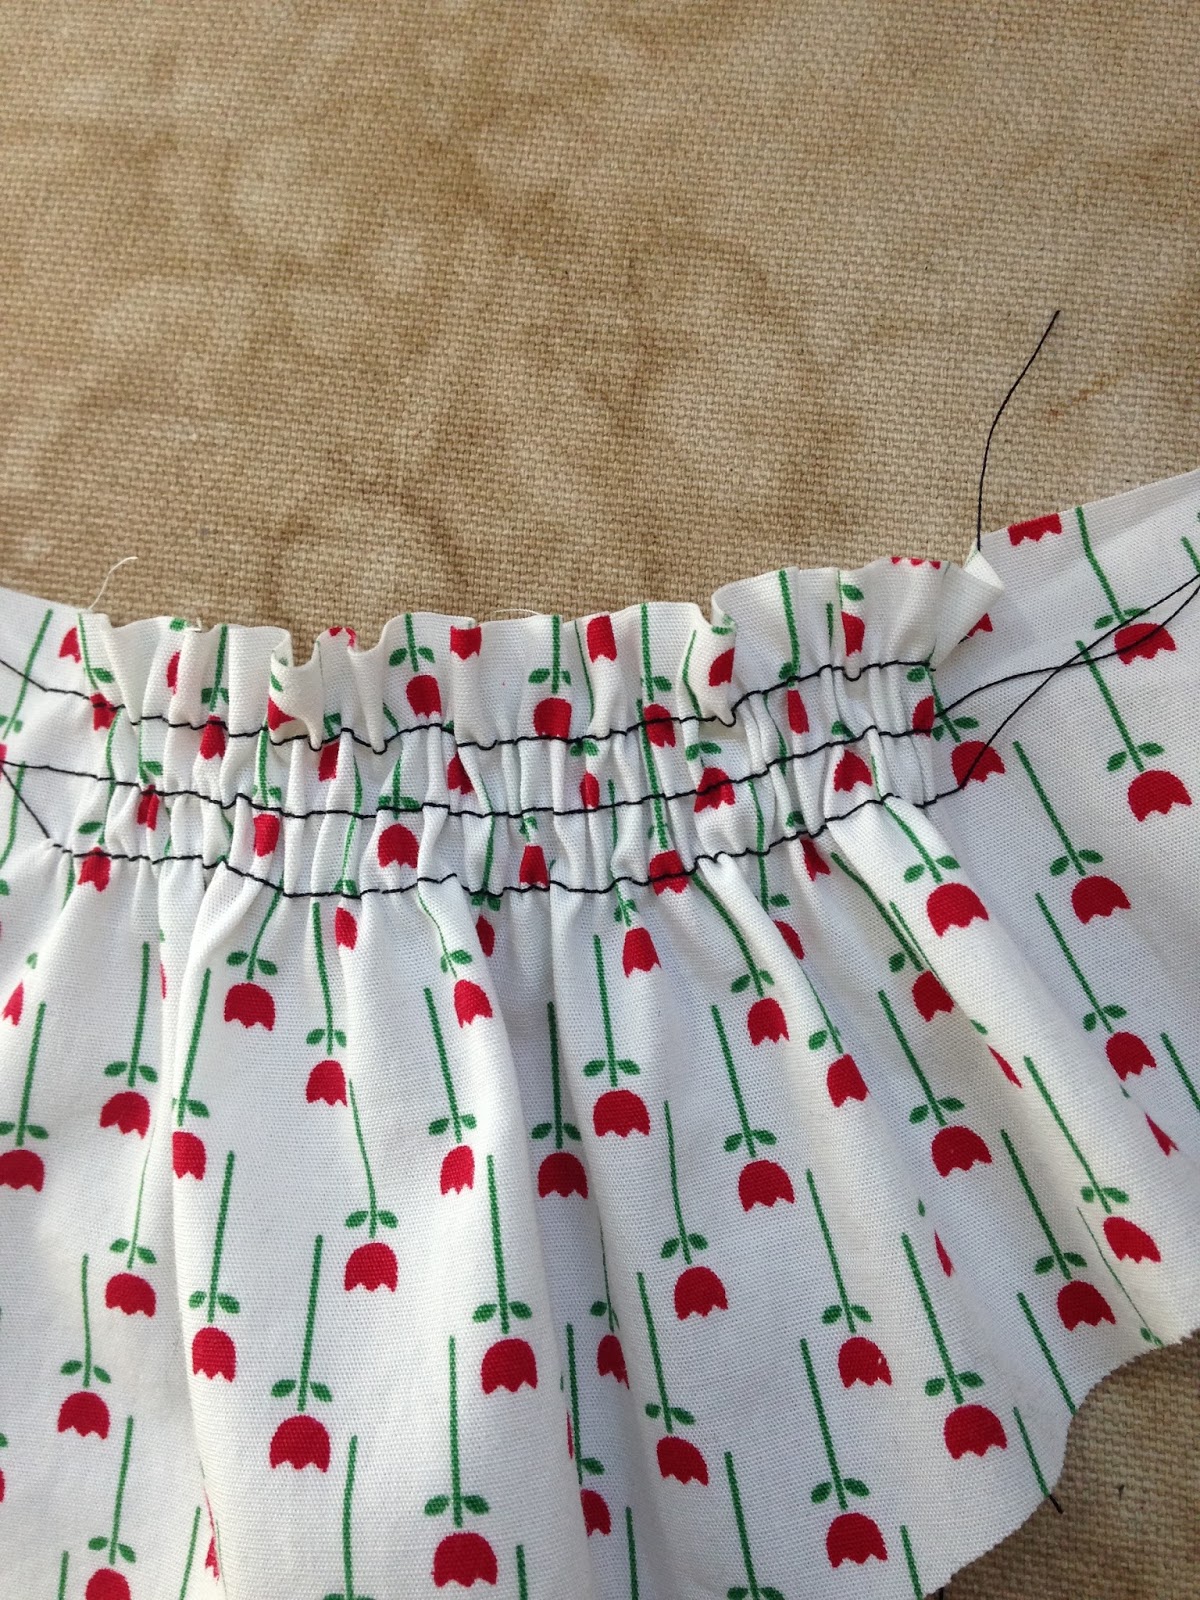
I didn't have to adjust tension or anything. I just used the longest stitch and used the edge of the pressed foot as a guide for spacing.
Here is the front


It's important to keep the fabric flat / stretched out as you stitch.
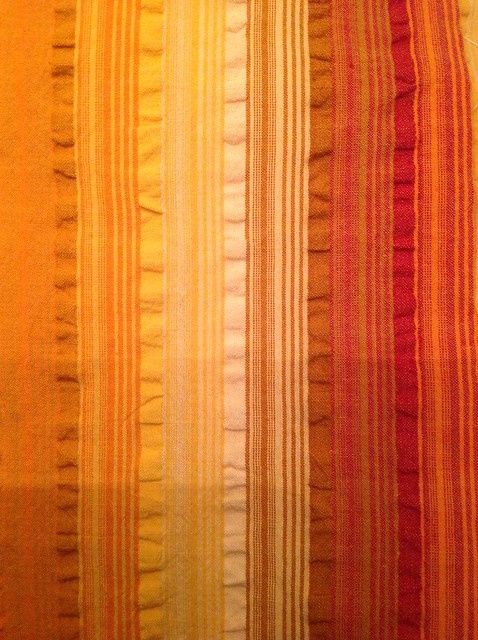
For this dress I used a narrow serged hem on the top and bottom edges, using embroidery thread in the upper looper on the hem.
The fabric is left over from a dress I made several years ago. It is a rayon crinkle. It has so much crinkle that it acts almost like a knit.
 My little 3-1/2 year old granddaughter already has her own sense of style. She loves maxi dresses, shirring, and drapery fabric, so I'm pretty sure this will be a hit. As soon as I see her next, I'll take pictures of her in it. I sure hope its not too long. I used another dress of hers as a guide, but it was a little short. I estimated how much longer I needed it to be. Hope to find out soon!
Monday, June 22, 2015
The Emma Dress
 It started out as the Emma dress, but after I realized how short it was, it became the Emma-top! I've been wanting to do some elastic thread shirring and even bought a big cone of elastic thread. I looked at all kinds of tutorials on line. I have done this before, but on a different machine. It was a whole different story. With my top loading bobbin on the BabyLock, I had to take the needle plate cover off every time I had to change the bobbin. And for using fabric 44" wide, I could do about 2 and a half lines of stitching, and then I would have to change the bobbin.
Another alternative would be to zigzag over the bobbin. I found a cording foot in my arsenal, and this really helped make that job easy. But of course, then you have to try to pull all the elastic threads evenly to get the gathering even. Although I eventually got it done, I think next time I will try doing it on my other machine and see if that works any better. Here is how I made the dress.
- Cut the fabric 2X the desired width (chest circumference X2) You could go 1.5 X as much and use a smaller stitch. Cut the fabric the desired length.
- I originally cut the fabric about 1 yard long. Since I did not have GD here to decide what length to make it, I was worried that it would be too plain as just one piece, so I cut the bodice part about 16" long
- I decided that I wanted ruffles, so I cut the first tier 2X the width of the bottom edge of bodice and the next layer 3X . So, I cut 5 strips 4" x 44"
- Sew 2 of the 4" strips together to make a loop and then sew the other 3 together to make another loop. On both of these loops, mark at 4ths to get your 2 side seams and CF and CB
- Use a narrow hem or rolled hem foot (That's what I did) to finish the top edge of the dress, and bottom edge of the largest loop.
- With elastic thread hand-wound in your bobbin and a longer stitch length (I used a 4), stitch parallel rows 1/2" apart (I just used the edge of my presser foot as a gauge.) Leave long tails on the edges in case you want to tighten up the gathers when you are finished. I ran rows of shirring for about 3-4" parallel to the upper edge. **Be sure to practice this first on a scrap of fabric, since all machines and fabric are different, you will get different results.
- Since my machine was not pulling the gathers tight enough, I adjusted them by hand. This is not easy to do and get it even. I did not think of the zigzag thing until after I was finished.
- Run 2 rows of long stitches along the top edge of both loops in order to gather. I stopped and started stitching at each of the seam allowances to help with the gathering, but do whatever works for you. It's a lot of gathering!
- For the straps I cut one piece 22x3.5" I folded it in half, opened it out and folded the edges into the middle. I then folded it in half again so that the raw edges were enclosed and stitched along the edge. I cut each strap at 11" and marked 1.5" from each edge. This mark was set even to the top of the bodice. You can play around with this and put the straps as far apart or close together as you want.

 After I finished the dress (DGD was still not here) I realized it would be way too short. As soon as she got here, I tried it on her. I ended up making a pair of shorts to go with it. All in all, this little outfit was cut and sewn that morning, and then I cut and sewed the shorts after lunch. She wore her new outfit that afternoon! I'd like to make her another dress with shirring, but I'm going to practice on one of my other machines until I get it with the right amount of gathering with the least amount of effort!

Sunday, June 21, 2015
Retirement Party dress on the move
As I drove up to my driveway, I smiled to see the stop sigh that said "Stop! Party here!" Then I saw this


Thursday, June 18, 2015
I can turn a 20 minute task into a 2 hour project
And that's exactly what happened on this dress. I knew that all I had to do was put in the zipper and attach the straps. Simple. Arghhh! Exhibit A:


Actually, I'm sure the party will be low-key and lots of fun. Great group of friends. I'm pretty sure now that my brother is NOT coming, but we will all have a great time anyway. Food, wine, friends, great summer weather (well, if you call 100+ degrees great, but we do have A/C), and the river. What else could you ask for? Oh yeah, and I didn't have to do any of the planning or work! Thank you DH and my great friend, Jennifer!
Retirement Party Dress - #maxisewalong
I didn't work on my dress yesterday. Migraine. Boo.
But, today is a new day. Headache almost gone. I must finish this dress today since the party is tomorrow, and I'm kicked out of the house for most of the day! I know there are some surprises, and I'm not asking questions. hehe... I think am hoping that my brother is coming out from Tennessee, but that may be a long shot. BUT, I still have that feeling - ya know?
Anyway, dress progress. This dress has a fully lined bodice as I said before. And the way it's done means no alterations after it's put together (that's always scary!!) I did make a muslin, but that's never the same as actually putting the dress together with lining and a zipper. Sigh. I guess I could baste in the zipper and see how that goes. That's all. I. have. left. to. do. Yay! (oops - forgot I will need to tack in the straps too) I've even hemmed the thing. I don't think I have hand hemmed anything in over a year, but I was zoned out from my headache yesterday and watching a little SYTYCD and America's got Talent on the On Demand. It started with a little hand sewing of the bodice. The whole thing is lined and then they have you attach the skirt and leave a raw edge. What's with that? I see this over and over in patterns. The thing is, the bodice is lined in parts, so it's not like you can really just pull that lining over and cover up the raw edge of the skirt. I decided to bring in a little Hug Snug and cover that baby up. Magic.

One thing I love about things that are lined and underlined is that you can do handsewing and never touch the outer fabric. No stitches showing!

I had already sewn stretch lace to the hem. I hate when a curved hem has to be "pleated" to hem up. On fuller skirts, I usually just do a narrow or rolled hem, but on this, I wanted the weight of the hem. I decided to sew on the stretch lace, stretching it as I sewed it so that the top of it would be smaller than the bottom. It worked perfectly. I even had a package of orange in my stash! (Love to search yard sales and thrift stores for things like this.) So, I decided to go ahead and hand stitch the hem too. I'm glad I did because it really does not show on the outside at all. Love prints and textured fabrics for that!
So here it is on poor old Myrtle, still waiting for a zipper. All I have in the stash that's even close to working is pink. Not going to drive 45 minutes to get a different zipper. It will have to be pink.


Tuesday, June 16, 2015
Maxi Love

Since I am doing the stash contest on PR, I decided I better find something in my stash to use. I originally bought this cotton fabric to make another dress with a really full skirt. Most of the fabric I have is in smaller cuts; not enough to make a maxi dress. This fabric has more than enough.
I'm calling it a madras / seersucker combo. Andy is throwing a retirement party for me this Friday night, and I figured this will be the perfect dress to wear. (If I finish it. If it fits. If it looks good)
I worked on this almost all day yesterday, but still have some things to finish up. Right now it is pinned together. This dress is a lot of work. Each bodice piece is interfaced and lined. That includes 2 bodice fronts, 2 bodice backs, 2 straps, and an underbust band. Also, those straps are a pain in the you know what to put on. They are very steep curves and you are putting them onto a straight piece in the opposite direction. Not fun. Especially since I altered the top, many of the dots and notches did not line up.
I happened to be checking out some reviews on PR and linked through to "Sewn by Ashley"'s blog. She is hosting a Maxi Dress Sew Along along with That's Sew Amy, so I'm in. Perfect timing!
I will post more pictures later!!!
(Gotta go. DH wants to watch a little TV together. It's too darn hot to do anything else.)
Saturday, June 13, 2015
Summer top - S1426
It's been getting hotter every day here. It is 101 today and going to get hotter later this week. I can stay inside where there is A/C, but I can't live my life indoors. Well, I can, but who would want to?
 Anyway, I decided I wanted to make a few summer tops. I hate wearing a bra when it's over 100 degrees out. It's just one more layer that I don't want. Strapless bras NEVER work for me, and I've tried dozens. The one that actually works the best is the nu-bra adhesive bra, but when you are dripping sweat, this is not the best option either. And forget going completely braless. Not happening. Well, it will happen with the right top - and that's exactly what I was looking for.
Enter simplicity 1426.

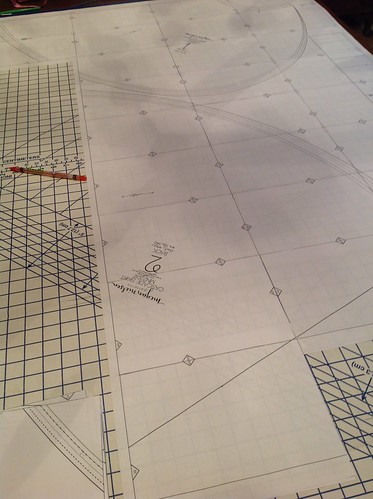
 Now mind you, I am 57, so I am not talking about going out in public, but for at home, and working in the yard, this is perfect. This pattern would be fast and easy if it fit right out of the envelope, but for this girl, that's not going to happen either. The first thing I did was try to figure out how to do a FBA on this. Here is my first shot.
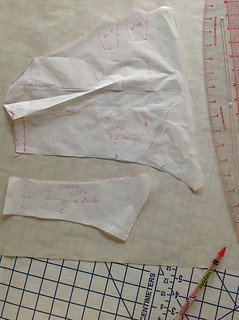
I think I will need to make some further adjustments. It fits OK, but not exactly right. I cut off part of the curve down at CF to avoid gapping, but now it is too tight there and pulls the CF up at the band as you can sort of see in the above photo.
I actually got the cups to fit almost perfectly, but I moved them farther apart at the center. The only problem with this was that I had already cut the band and they did not fit correctly into the band. What I SHOULD have done was eliminate how much I moved them apart from the side seam. Unfortunately, I had already sewn the upper band, so that was not an option unless I wanted to take the whole thing apart.
This is good enough for now and for working in the yard. I'd like to try it again making different alterations. Also, the other views are all cute and it's going to be a long hot summer...
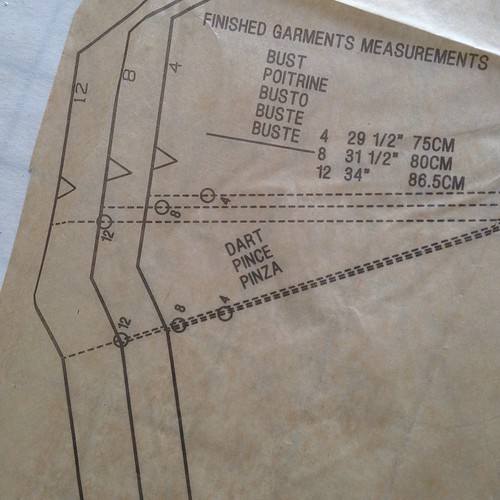
A lot of people were confused by the band instructions on this, but if you followed it step by step, it was really fine. The problem I had was with the original pattern darts. Look at this. Any ideas WHY the size 4 would have a deeper dart than the size 12? This just does not make sense to me.


Tuesday, June 09, 2015
Fun With Fabrics
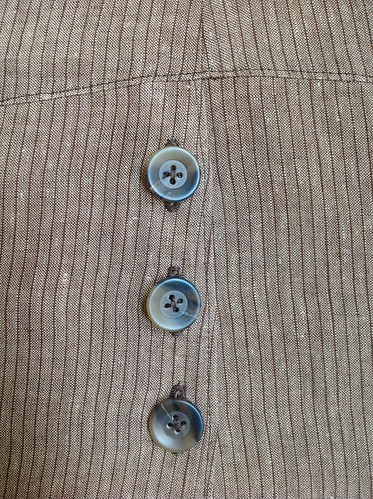
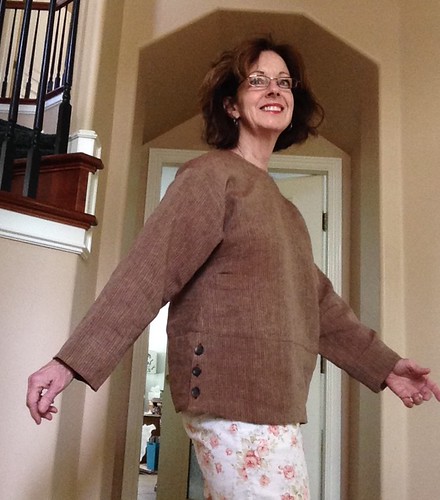
 Over the past year I have collected quite a few Cutting Line Designs patterns, although I have only made one up to this point. I think I actually got this pattern at the PR pattern exchange at PR last month. The pattern in Fun With Fabrics. I had decided to make the top sleeveless, but after looking at the pattern pieces, I figured I better make it with sleeves first to see. I didn’t have enough of the white fabric that I wanted to use to make it with sleeves, so I pulled this brown linen out of my stash to try. I originally bought this to make a pair of summer pants, but after I got it home, I realized it was too thin and would probably be so wrinkly and light weight that it would look like pajamas!
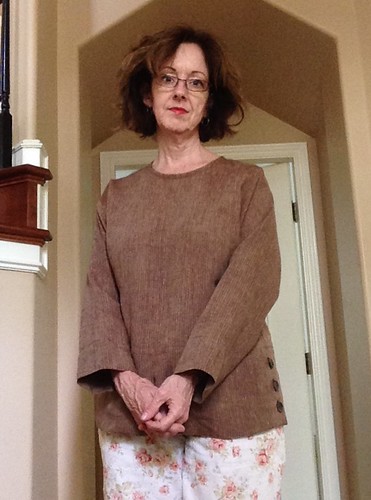
I enjoyed making this top and the construction process. The neck is bound with bias binding, but I must have bound it too tightly because now I can barely get it over my head! Next time I will cut the neck larger because I’m really not a fan of jewel necklines, although I don’t think it looks bad on this.
Sunday, June 07, 2015
Cascade Skirt
 A while ago, Deepika posted a review for Megan Nielson's Cascade Skirt. I really liked it, and finally bought the pattern. I'm not a big fan of digital patterns. Getting them printed at a copy shop is expensive and putting them together is time consuming. Since I went through putting this thing together, I will definitely make it again!

I have had this Rayon georgette fabric for years! I got it in a rayon mystery bundle from Fabricmartfabrics, probably about 10 years ago. I've never known what to do with it, but when I decided to make the cascade skirt, this was one of the few fabrics I had enough of that was suitable. This skirt takes about 4 yards of fabric! (plus lining if you use it!)
This is the first time I've used a Megan Nielson pattern, and the directions were great. It was easy to put the skirt together, and I liked that she has you use French Seams. I was working with a rayon georgette, so I would have used them anyway, but it's nice to have that finished seam no matter what the fabric. On this type of style, your seams will show.
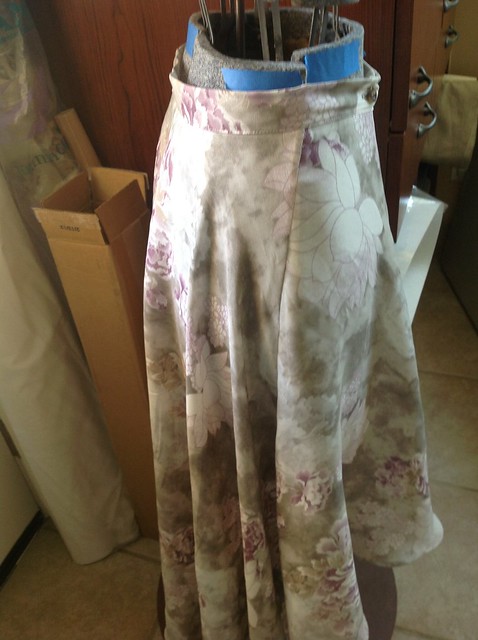
If you've ever worked with georgette, you know that it is really easy for the fabric to shift while you are cutting it out. I'm always so careful to keep everything on grain, but sometimes, it just doesn't happen. I should have picked up my pattern pieces and recut them, or cut everything in a single layer. Then, maybe, this would not have happened:
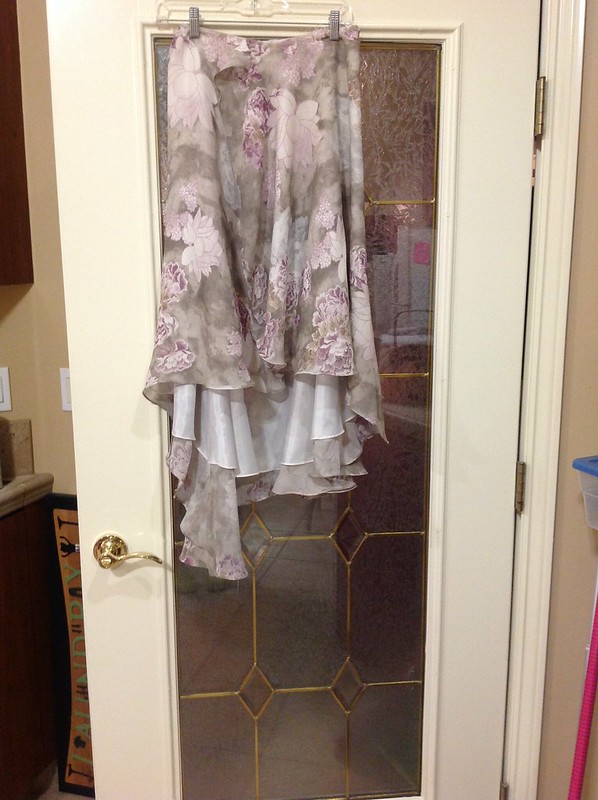
I don't know if this happened because the fabric was off grain when I cut it, or something else, but I had to lay this out flat and cut evenly 2" away from the lining all the way around. It was just this one side that was hanging down. Even though it was "fixed" after I wore it today, I can see that it is still hanging down more on that side than on the other side.

Although it doesn't look as noticeable from the back:
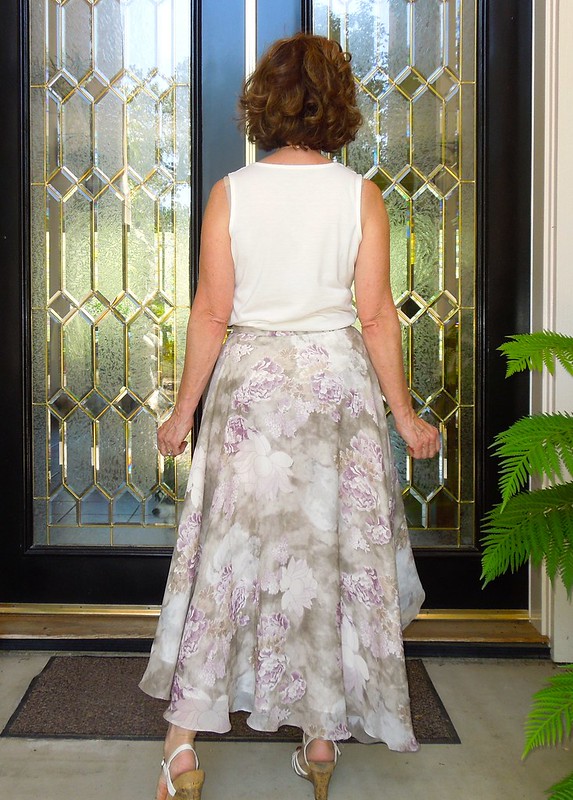
Using a rolled hem foot was a real time-saver on this thing. Both the lining and the skirt needed to be done. Even though I had to fight with it part of the time, it still makes a great finish and I love it. I think it's one of those things that the more you do it the easier it gets. That's why I hemmed the lining first!
I'm not sure why this skirt swings to the back. The only way I can think of to correct this is to lift up the CF and wrap edge of the skirt. However, If I do that, the skirt will lose a lot of its drape in the front. I don't like it though, and am not sure how to fix it.
I probably will make this skirt again with a few tweaks. Another thing I will do is lower the waist line on the skirt front edge. The pattern piece really goes up, and this causes the front to move toward the side seam. If I lower the upper edge (essentially taking a dart off the top) this will bring the skirt farther across the front which will keep it from gaping open so easily.


