Showing posts with label FBA. Show all posts

Tuesday, July 17, 2012

Bombshell part 3 - Getting the muslin right


muslin 2
I am so excited!  I think I actually have the fit of this bodice now!
When I got up this morning, I decided that what I needed to do was to lower the bust curve, but I wasn’t sure how.  I  looked at the pattern pieces and how they were graded up to the next size.  My lower bodice is cut in a size 36.  I decided to start with altering to a size 40 cup.  The first thing I did was trace the lines for the two lower bodice pieces top edges onto tracing paper.  I then traced those lines onto the muslin so that I could make sure that the cup would line up with the new curve that I drew.  I then traced the size 40 cups and left a generous seam allowance all around (good thing!) I sewed in one, and could see that it was still too small.  You can see the blue line where I redrew the bust curve.

Next, I added to the height by adding to the horizontal seam line across the front of each cup.  

This seemed like it would work, but I need to try it on.  My dress form is not exactly my shape, so I wanted to try this thing on my real body to make sure.  
At this point, I sewed the back pieces together and added a long zipper so I could get it on and off easily.    After trying this thing on about a dozen times, I kept making little alterations.  


My final alterations were to  do this:
(only the right cup has the final alterations on this muslin)

  • Keep the size 36 lower bodice
  • add 1/2 inch to the top of the lower cups and the bottom of the upper cup for a total increase of 1”
  • Used a marking pen to add to the sides and center front of the cups.  A total of about one to one and a half inches.
  • I also added to the lower portion of the cups which also changed the shape of the cups.  I sewed these changes in by hand and marked them with a marker after they were sewn.  (Unfortunately, I did not use permanent marker, so you can see where the ink spread when I turned my iron upside down to press a curve and water spilled out!)
  • I also took a small dart in the outer part of the upper cup.  I was having a little gapping there.
  • I pinned out almost an inch in the back that I all remove by making a sway back alteration to the back pieces.
  • I may also have to take a little out of the side back seams, but I will be able to do that after all the layers are put together.


Now the trick will be to take this apart and make all the changes onto the new pieces.  These cup pieces are so messed up and only the right one is the correct one.  I think I will need to trace a new set of cups based on all of my changes.

Monday, July 16, 2012

Bombshell part 2 - muslin

This evening I decided to try to put my muslin together.  With anything this fitted, it is always a challenge.  I never really know what size to start with, so I decided on a 36 for the bodice and 38 for the skirt.  I knew I would need to do a FBA.  It is frustrating and discouraging when I have to keep lowering the bust point!!  Age and gravity are not always my friends ;-/

The nice thing about putting the dress together this way is that there is no worry about seam allowances since you are only working with seam lines.  The thread tracing helps you feel where those are and how they should match up.  This is very helpful on the bodice.  It is a little tricky to fit it all together, so after pinning and seeing that it wasn't' lining up right, I decided to hand baste it.  This worked perfectly and everything lined up this way.  Well, it all lined up, but that doesn't mean it will fit!  I could tell after assembling just one cup that it would be too small.  I knew I would have to do a FBA, but now I'm worried about the lower bodice.  I think the circumference will be fine.  It is the depth and location of the cups that need to be altered.


At first I thought I would need to shorten the waist and raise the center front.  I think the line for the cup is wide enough.   But, now that I think about it, I need to lower the curve of the cups.  this may be a little tricky, so I'm waiting until tomorrow to tackle this.  I think I will need daylight and a few cups of coffee to dive into this.

Saturday, May 12, 2012

Summer Top

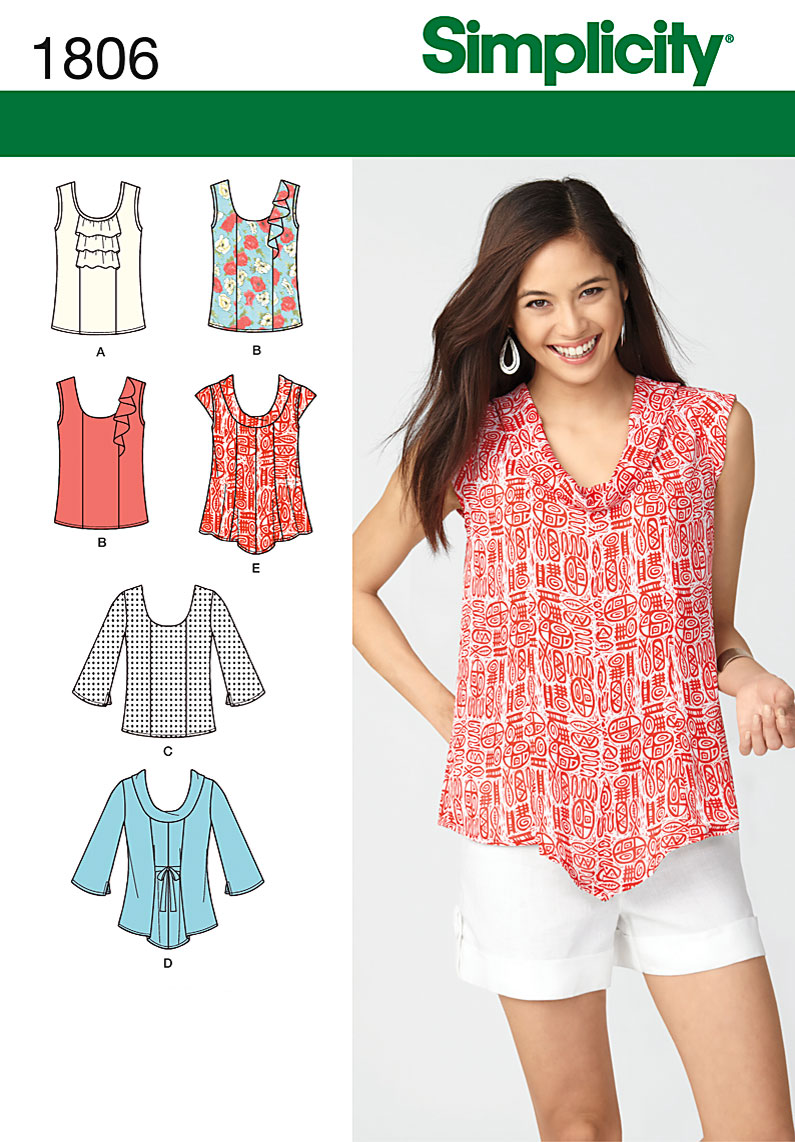
It seems to go from Winter to Summer in just a couple of weeks here.  It's been in the 90s all week and looks like more of the same next week!  I'm not complaining though, I'm one of the rare ones around here that would rather have the heat than cold.  Even though I don't have the arms I did even 10 years ago, I still love sleeveless tops!  I need to make a lot of sleeveless and short sleeved tops since our hot weather lasts well into September and even October.  This is Simplicity 1806.  I was drawn to this pattern for a couple of reasons.  First of all, I really wanted to find tops to make out of wovens.  My favorite summer time fabric is cotton lawn, so this will be perfect for that.  I also like the princess seams.

While making this top, I realized that the "princess seams" are not quite that.  It is more like a center panel.  However, the FBA is still done the same way, and I really prefer doing a FBA with princess seams rather than having to deal with super big darts.


In this method, you slash the side front about 1-2" down from the armhole seam from the front edge just to the seam line.  You spread the front edge apart at the seam line 1/2" for each cup size above a B.   So, for a D cup, you would spread it one inch.  This creates a greater curve at the front edge.  Next, slash the Center front piece across the same spot and spread the same amount.  Because I have narrow shoulders and a large bust, I just trace my size at the shoulder (determined by upper bust measurement) and then continue the armhole out to my bust size at the side seam.  I have tried other methods for doing the armhole, but this one works best for me - of course, it depends on the pattern.

Right now I'm trying to make sure that I have all of the pieces I will need to take with me to Uganda.  Since I will mostly be wearing long skirts, and most of them are printed patterns, I need some solid colored tops.    I looked through my stash finding all kinds of prints that I wanted to use to make this top, but eventually fell upon a piece of embroidered lawn that I had left over from a shirt I made a couple of years ago.  I thought this would be a good one to try out the pattern.

This pattern is pretty easy to make.  The ruffle is cut as a flounce and is easy to insert.  The neck edge has a facing on this view, but binding on one of the other views.  I did use the facing, but cut it out of a lining fabric as I thought it would be too heavy with all the embroidery.  Next time I would probably just bind the neckline.  I'm not normally a fan of facings unless they are stitched down.  This pattern also has you bind the armholes, but I just serged them and turned them under.
I need to do a little tweaking on this pattern, but all in all, I think it's a keeper!