Saturday, December 27, 2014

Getting Started Early

Since I did hardly any sewing for 2014, I'm counting anything I make now for 2015!   I'm strongly considering doing the 2015 SWAP over at Stitcher's Guild.  One of the things I want to make is this Tom and Linda Platt top from Vogue 1415.  I have something called "Eurostretch crepe" which is a rayon blend.  No idea where I got it.  It's cream colored.  I think it will be perfect.

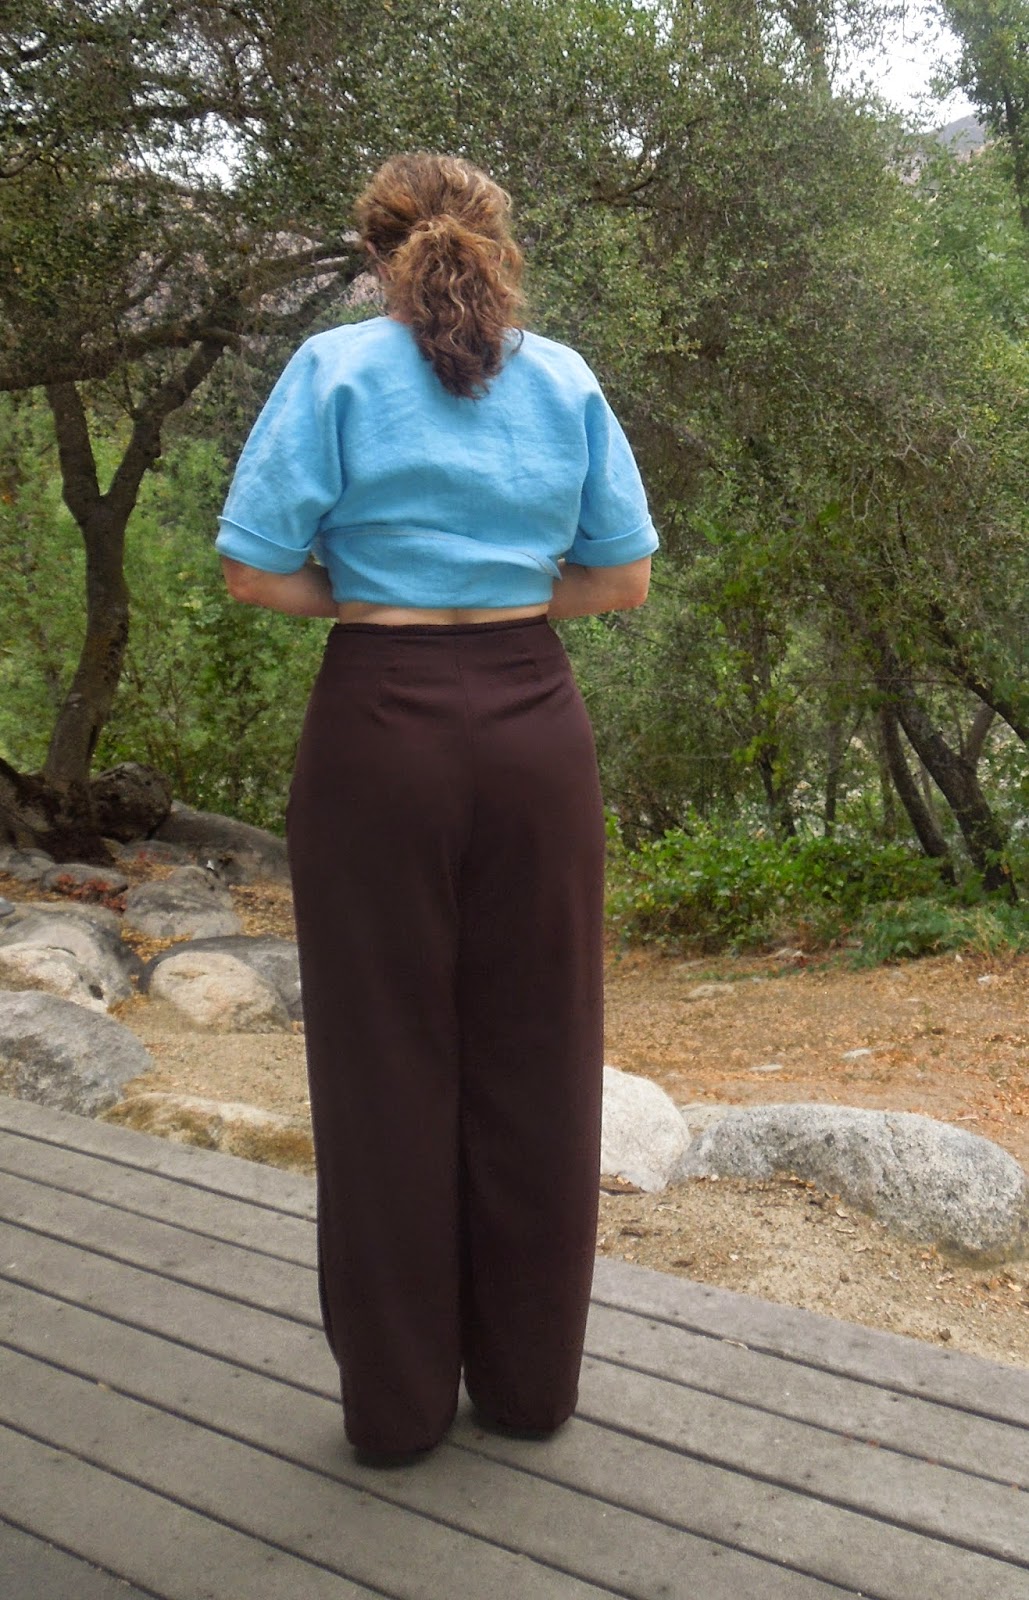
I never know how these things are going to look on me, so I decided to make a wearable muslin.  I'm absolutely in love with cotton lawn and buy it whenever I find a piece that I like.  I'm pretty sure that I got this piece at Stone Mountain Daughter in Berkley at the last PR weekend that I attended.  I'm really happy with how this turned out.
This was actually quite easy and fast.  The one thing a new sewist would need to know is that all it says is to sew in the sleeve.  There is quite a bit that needs to be eased in, and they do not have you run an ease line.  I was able to ease it in by sewing with the sleeve down and adjusting tension with my fingers, but someone new to sewing may not know how to do this.  Other than that, everything was super simple.  There are no darts in this pattern, and although there was plenty of circumference, I added a little over an inch to the front hem to add length over the bust.  


So, today I cut out the cream colored crepe, I cut out a dress from V1250, a DKNY dress that I've made once before.  I bought this fabric specifically to make this dress (probably at the same PR weekend) so I'm glad it's finally going to happen.  I'm a little concerned because the fabric does not have as much stretch as the last one I made (and I have a bit more width than the last time!)  I added a about 1.5" in the circumference, so I hope that will be enough.  I have to get this dress made this week because I'm wearing it next weekend when we go out with some friends.  When Andy and I lived in Visalia, we went out a lot, and it was never a big deal.  Visalia is an out of the way town, but we have a ton of fabulous restaurants.  If you ever go through our area, I can highly recommend 
  • Fugazzis
  • The Depot
  • The Vintage Press
  • Watson's (only open for lunch, but great vegetarian food)
  • Pita Kabob - three locations, all excellent
  • Brewbakers if you're looking for handcrafted brews
  • Taj Palace - Indian food - lacking atmosphere, but great food
  • Several sushi restaurants.  Our favorites are Gozen and Sake
  • Plus a slew of mexican restaurants and chain restaurants (Olive Garden, Chilis, Panera, Wild Wings, etc)
Well, I can go on forever on that, but the point is, now when we go out to dinner, it IS a big deal.  There are several restaurants in Three Rivers, but unfortunately, I wouldn't recommend any of them.  Well, I take that back.  Sierra Subs has GREAT sandwiches and unusual menu items, but they're usually closed by the time I get home from work.  So, we're going for a big night out on the town with some friends next week and I want to have a new dress.  Here's a preview on the left.

I love the brushstroke fabric!


Well, I haven't done a lot of sewing, but I did do some crocheting for Christmas.  Made a couple of hats.

And, a beautiful alpaca/merino shawl/mobius scarf for my daughter.  I was really disappointed with the yarn because it sheds like crazy.  It is super soft and warm though.  The color is gray, but it looks almost white in the picture. 

Oh, and I did sew an ipad cover for my sister in law.  These are a pain in the butt, so I hope I don't make any more of them.  I made them for 3 of my coworkers after I made my own and said "never again."  Well, never came, but I hope that's it!


Saturday, November 29, 2014

Loes Hinse Ascona Pant take 2

On this version, I made a size smaller, took a dart at the butt, and adjusted the waist line.  Well, I think I should have added a LOT more to the back.  Let's just say, these pants aren't going out in public if there's even the smallest chance that I may sit down!!
Other than that, the fit is much better.


This time I used 1.5" elastic using a waistband trick taught to me by Loes Hinse in her shop one day.  Use 1.25 - 1.5" elastic and serge the end as usual.  After turning, only stitch at the 1" line, leaving 1/2" free.  This gives a flatter waist for those with a bigger difference between waist and hip.  It works for me.


The problem with these pants is that once I decided to use wider elastic and take a 1/2" dart at the CB, this lowered the waist too much and I did not compensate for it.  I'll have to donate these to a lady plumber!  They say the third time is a charm, so I hope so!  I like using the 1.5" elastic as opposed to the 1" elastic.  And a word about doing the elastic.  I love Loes's way of serging the elastic to the waistband, turning, and stitiching.  The PROBLEM with doing it this way is that you have no way to adjust the waist band after you try it on!!   Also, depending on your elastic, serging the end may stretch the elastic to a bigger size that does not retract!!   I DO have a solution.

  1. First, try the elastic on at the height you want to wear the pants.  Pin it with a safety pin.  Leave it on
  2. Put the pants on and and pull them up under the elastic and then fold over so that the waist edge of the pants now meets the bottom edge of the elastic.  Check the fit.
  3. Change your serger to a longer stitch length.  I have an old serger, so I used the longest stitch length I could get.  This helps prevent the elastic from stretching out on the stitched edge.
  4. Do NOT use non-roll elastic.  This seems to stretch out the worst.  Use a good quality elastic.  I buy mine from Peggy Sagers.  You have to buy a lot, but the great thing is that you can cut it to any width you like.  
  5. Turn your waist over and stitch as per pattern directions or as above.  If you have not much difference between waist and hip, then use the directions in the pattern.  If you have bigger hips and a smaller waist, you may want to try the method I described above.
Another thing I did differently from the pattern is that I added a piece of twill tape to the rear seam to keep it from bagging out.


This pair of Asconas is a little tighter than the last because there is not much stretch as compared to the RPL I used last time.    As you can see, the fit in the butt is a lot better than the first pair.  It would be even better if I had on different underwear!!

Because there is little crosswise stretch in this fabric, these are a little too tight in the legs. 

 Now I'm anxious to try pair # 3!


Friday, November 28, 2014

Loes Hinse Ascona Pant take 1

I got this pattern over a month ago, and have been really wanting to make it, but life keeps getting in the way.  Well, I finally got the time and got up the nerve to cut into some RPL that I've had for a long time.  I didn't really have anything to muslin these pants, so I had to just give it a shot.

  1. I went by pattern measurements and decided to cut a medium, which is a 40" hip.  I made it as is with no changes.  Blech!
  2. This came out TOO BIG.  Well, I'm not sure if everything is too big, but it is supposed to b e a lowered waist and it came all the way to mine.  Also, the waist was as big as the hips (even with the tiny darts in the back) so there were major gathers at the waist.  I really didn't want a pant that came to my waist, so I cut off the whole waistband, which lowered the waist by a little more than 2"  I've made that adjustment on my pattern, plus will take an additional 1" off the front
  3. Even with this change, there is still the problem of major baggy butt.
  4. So, remembering all of the Peggy Sager's webcasts on pants, I took a dart across the seat, really thinking this would NOT help, but being the obedient seamstress that I am, I decided to try it anyway.  Well, as you can see in this picture, the side on the right, which I pinned, is much better than the left.  Now I've made this adjustment on the pattern as well.
  5. The pants still seem to big in the legs (and I've got big legs!)  I was really expecting them to be much narrower at the hem.  I've traced the smaller size onto my pattern, but not sure if I want to cut it yet.  I still have enough of this fabric left to make another pair, so I don't really have anything to lose.  The pattern said it would take 1-7/8 yards of 60", but my fabric was only 58" and I was able to squeeze it into 1.25 yards!  Now that's what I like!
We're going over to friends' for dinner, and since I'm making some of the food, I don't think pair number two will get cut out tonight.  Could I possible get lucky enough to get some sewing in two days in a row?  

I haven't gotten to sew much, but I have done some crochet.  The good thing about crochet is that it is so portable and can be done just about anywhere.  I made this awesome scarf and I just love it.  The yarn is Pediboo by Frog tree and it is super soft.  I love it!

Thursday, October 16, 2014

Mei Mei and cupcake dress

I've been working on a crochet project called Mei Mei from Doris Chan's Everyday Crochet.  I love pretty much everything in this book. Even though the book is older and the styling may look a little old fashioned on some, the styles all have good bones.  I have been looking for a little shrug pattern. This turned out pretty quickly once I figured out what I was doing.  I saw that one Raveler completed this little shrug in 3 hours!  It was more like 3 evenings for me. :-)


Today I'm going into town to buy a couple of shank buttons to make a closure for it.  In the picture below I am just using a shawl stick.


Sunday is the little granddaughter's birthday.  She will be 3!  I made her a birthday outfit, but the top came out too long.  I cut just about an inch off of it after I took pictures, so I think it will be a little better.  I didn't want to cut off too much since I had added the pockets and just estimated where to put them based on the length I had made.


To make the cupcakes I drew a cupcake and then traced the top and bottom separately onto heat and bond.  After I adhered it to the dress pieces, I stitched lines for the cupcake liner and zigzagged around the outline of the cupcake.  I used a permanent marker to draw lines on the center cupcake.
After I took this picture, I removed the basting you can see around the neckline, and topstitched the yoke which also stitched down the inside of the seam where the yoke and skirt join.


We had a little distraction yesterday.  Right next door a mamma bear and two babies were foraging around.  I'm thankful that my neighbor called me so that we could walk over and take a look.


Sunday, August 03, 2014

Simplify Your Life

This is the Simplify Your Life pattern from Cutting Line Designs.  I am always attracted to and inspired by CLD and Sewing Workshop patterns.  I love both versions of this top.  On the envelope.  For some reason, I always feel like I should look more like the drawing or model when I make the garment, but I never do.  I made view A, which is the button front.  I used a turquoise linen from my favorite linen source Fabrics Store.  
I'm very happy with the way it turned out, just not so much the way it looks on me.  I did make some adjustments to the pattern and will make a few more when I make it next time.  This time I:
  • cut a size small according to my measurements.
  • Did a full bust adjustment as shown by Louise Cutting on Threads Insider.  I did a 1.5" length adjustment only.  The width was already OK.
  • I shortened the sleeves by 1"
  • I raised the armhole by about 3/4 inch and took in the waist 1/2" at each seam for a total of 2" reduction.
  • I made a split hem.  It was pulling at my hips and forcing the pleat in the front to pull to the side.
Next time I am going to:

  • Narrow the shoulder about 1/2" 
  • Shorten the sleeve even further
  • move the top button up just about 1/2 further so that it doesn't pull at the top
Any other suggestions?

The first time I make a pattern, and especially if it is the first time from a new (to me) pattern company, I like to make it exactly as the directions say.  I often learn new techniques this way.  For some reason, I really had trouble understanding how to line up the pleat on the front of this thing.  I could have done it my way, but I was trying to follow the thinking of the designer.  I just couldn't get it.  I finally asked SewTerri from Artisan's Square for help.  I knew she had made this particular top before and she has made many CLD patterns.  She generously sent me pix of the inside of one of hers.  I could see what mine was supposed to look like and was able to fix it.  I'm still not sure of where I messed up, so I guess I'll have to make it again if for no other reason but to find out what I did wrong!!

The pants I'm wearing with this are the Mimosa pants from The Sewing Workshop.  I thought they fit really good - but the camera doesn't lie!!  I definitely need to take a dart across the top between the butt and waist.  Also, it looks like I need to add a little at the butt for fullness.  I'm not really a fan of this shaped leg, so I may or may not make these again.  I already have short legs.  I don't need anything to make them look shorter.
 The pants were easy and went together really fast, so I may work on taking them in to be more fitted from the hip to the knee and see what happens there.

What do you think?


Thursday, July 24, 2014

Cherry shorts and a denim skirt

Today was a great day.  A friend of mine and her daughter came over to learn to sew.  My friend Betsy and I teach together.  Her daughter Nikki is a sweet girl, and the one I made the laundry bag for a while back.  Nikki hasn't really done much sewing at all, and although Betsy has done a little, she hasn't really used a pattern.   Last week we picked out these two patterns and some fabric.
Simplicity 1663 and


Simplicity 2224


The shorts were pretty straight-forward elastic waist shorts. First, I had her bring a pair of shorts that she liked.  We measured that inseam in order to know how long to cut them.  I think we cut off about 3" in length.  After tracing the pattern,  I had her cut out the shorts adding an inch to the top just in case.  Then she assembled them up to doing the casing.  Next step, try them on.  We put  band of elastic around where she wanted her waist to be and then marked it with chalk.  We looked at the pattern and saw that there was 2-1/2 inches above the waist marking to the top of the pattern.  We took the new waist marked line and added 2-1/2 (or whatever the measurement was - I'm too tired to remember now!) We made these same changes on her tissue, so now she has a TNT shorts pattern that she loves!  And just look how cute they turned out!!

At the same time, Betsy and I worked on her skirt.  What at first glance seemed to be a simple elastic waist skirt with patch pockets turned out to be more challenging for a beginner than I had anticipated.  Betsy had some experience with the machine already, so that was helpful!  She also is very smart and very mathematically minded, so these things worked in her favor.  This pattern has

  • patch pockets with pleats and a separate top band (which, by the way, are incorrectly drafted in the size small)  we had to fudge pocket placement because the pattern piece barely fit into the seam allowance where it belonged.  I double checked all of Betsy's work and everything seemed right on.  Then I laid the original pattern pieces on top of each other and they did not match up at all!!!
  • a separate waistband with side seams.  The skirt has no side seams.  It also does not have CF or CB seams, so lining up the waist band would not be easy for someone who had never done this before.
  • buttonholes!!  That's right, the tie in the front is actually a drawstring and it runs through buttonholes in the front!  Yikes - what did I get this poor girl into?
  • Not only that, the layout for this skirt requires that you lay part of the skirt out with the fold on one side and selvedges on the other.  Then, you fold the selvedges in to the middle so that you have a fold on each side and cut out 2 more skirt pieces.
This pattern is marked "easy" but I would not call it easy for the above reasons.  Well, Betsy was a champ and her skirt turned out fabulously.  I think they both also have a new appreciation for the use of the iron in sewing, too :-)  I'm so proud of the work they did today!

TSW Mimosa Top

I thought I had posted about this, but obviously, I did not.  Last week I made the Mimosa top and pants from  The Sewing Workshop.

I really like the asymmetrical front on this top.  Surprisingly, the pants turned out to be a winner.  I don't have pictures of them yet, but will eventually.  I made the top out of a quilting cotton.  There are a couple of things I would change about this top if I were to make it again.

The top gaps in the front.  I did not add a dart to this pattern and maybe it needs one.   I wanted to try it as is since TSW patterns have such a huge following, but this no dart top did not work for me.
The other problem is that I made it out of a quilting cotton.  Even though the cotton that I used was soft and had a nice hand, it was not right for this.  They do list cotton as a choice, but really - cotton can mean anything from lawn or voile to denim or duck!  A voile might have worked better.  Anything with drape would have been better since there is NO shaping in this top at all.

One of the reviewers on PR put a snap in the front to avoid the gap.  I may do that to mine.  The cool thing about this top is that you can fasten it in two different ways.  You can make it asymmetrical at the hem (as shown in the line drawing and my picture below) or you can fasten it so that the bottom hem is even.  When I fasten it that way, the top does not gap nearly as much.  But, I like the way it looks better the other way, so now I have gap.   Actually, it's not bad, and it does not gap at all when I am standing.  Sitting is the problem.

 The other problem with the fabric that I used is the color.  It's just too much of one thing.  I really like solids or near solids, but there is not enough detail in this top for it to work well unless you had a beautiful solid color silk or something.  Or maybe it's just the color. period.  I bought some trim that I might add to make it better.

I’m always attracted to the wrap style, but I’ve never really seen it work well without a little help from a snap or a pin.  On this particular top, you would not want to change the curve of the front, because then you would have to totally redraft the front band, and that’s one of the cool things about this - the way that band is made and put together.  

Even if I never wear this top, it is the most “fun” I’ve had making a pattern in awhile.  I’m not sure why that is, but there was just something about it that was clever and interesting.  I used to always feel that way when I made BWOF patterns, back in the day before BurdaStyle.


I’m hoping to have a fun sewing day today.  A friend and her daughter are coming over and I’m teaching them how to sew.  My friend is making a skirt, and her daughter shorts.  The thing is that I woke up at 3 a.m. and haven’t been able to go back to sleep.  I’ll probably take a nap after they leave today!  Wish I could sleep now instead!!


As I said earlier, the pants turned out really well as far as fit, so I will write about those when I take pictures.


Friday, July 18, 2014

Pet Peeve: Curvy Does Not Mean Plus Sized!

Maybe it's me, but I get so frustrated when it comes to fit.  I hear something about "Curvy" sewing or curvy crochet, or curvy clothes, or curvy wardrobe planning and get excited to read all about it.  Then deflation hits - it's all about being plus sized.  Those challenges aren't necessarily mine.  I am curvy, but I am not plus-sized!  (Well, after my cruise, I may have to change that statement if I don't make drastic consistent diet changes.)

I'll tell you that Levi's got it right with their  bold curve jeans.  It is almost impossible for me to find jeans that fit - especially fitted jeans.  Skinny jeans (and believe me, I've tried numerous brands) will not fit me.  If I finally get them to go around my thighs or calves, I am actually looking at something like a 16, and then the waist is way too big, the crotch length is wrong, etc.  Levi's bold curve fit me perfectly!  No gapping at the back waist, no tugging on the thighs, and they actually make my butt look good!  Too bad is too hot to wear jeans :-(
But seriously, I'm so happy about finally finding jeans that fit. I was actually looking for skinny jeans, but the guy in the store was really helpful.  When I told him that skinny jeans strangle my calves, he suggested the "slim fit",  These were exactly what I wanted! The first time I bought a pair of bold fit (they were straight leg), I got the 6 regular.  They have changed their sizing now, and I wear a 29, which I think is equivalent to an 8.    The problem is, these jeans are not readily available in many departments stores.  Luckily for me, there is a Levi's outlet not too far away.  They are also available online if you already know your size, but I ALWAYS try on pants.  Uh, that's the model to the right, not me :-)


 Now, back to the issue that brought this up.  I was reading Sham's website, Communing With Fabric, and I saw a link to Curvy Sewing.  This is a new website that targets "curvy" women.  However, when I looked at their tag-line, it said "a plus sized sewing community".  I did sign up to be a member of the site, because it looks like there may be some good information coming through there, but I was disappointed.  Then I found this on the web. Curvy Does Not Mean Plus Sized.  Gotta love Kathleen Fasinella.  Her book has been on my wish-list for years.  One of these days I'll have to give up the cash and get it.  Here's the definition of curvy:   

 The technical definition of curvy refers to a waist-hip differential of .75 . For example, a woman with a 36″ hip is curvy if her waist is 27″ or less. This is a nine inch difference but does not hold true for all dimensions because curvy is relative. It’s math, not opinion. By way of comparison, a hip measure of 46″ is only curvy if her waist is 34.5″ or less, a difference of 11.5″. 


Check this out.  According to the definition above, the girl on the left is curvy, but the girl on the right is not.  Each model was measured at the waist with a green line and that same green line was copied and pasted onto different areas of the body.  You can see the difference!  Of course, the true measurement needs to be all the way around, but the lines are drawn just for a visual.

Lets do the math.  My measurements (as of yesterday) are 36-29-40.  Using the formula above, .75 X40 =30.  Since my waist is only 29, this qualifies me as curvy.  Now, let's look at the bust measurement.  36 X .75 = 27.  Since my waist is over 27", according to the forumula above, I am not curvy.  However, I wonder if there is a caveat.  My upper bust measurement is 31.5 and my underbust is 30.5.  Visually, I am very curvy on the upper part of my body.  There is a 5" difference  (averaging upper and lower bust measurements) which is almost 14%.  I wonder how/ if this factors in.

 So, what I really want is information on how to look best for the true curvy girl, fitting tips, wardrobe ideas, etc.  It's hard enough to decide what is stylish and appropriate to wear when you're 50+  Most fashion magazines, patterns, etc., use very young, very thin models.  I want to be stylish, but not look like I'm trying to look 20.  I also don't want to look like a frump.  My style is changing now that I live in a foothill community, but I still work and want to look well-put together, but be comfortable (shoes are always an issue.  Stylish and comfortable just never seem to be in the same arena - but that's another post.)

So, are you curvy but not plus sized?  How have you met the fashion challenges?  What resources have you found valuable surrounding this issue?

Wednesday, July 16, 2014

New Dresses - lost pix

Well, I took lots of pictures for the 2 dresses that I made, but my computer ate them as soon as I deleted them off the camera!  Talk about aggravating.  That was the night before our trip, so I did not go out and retake the pictures.  I did get one picture on the ship of the long dress I made using McCalls 6725 for the top and CJP Basewear 2 for the skirt.  I had lots of pictures taken in the other dress, but I looked like a crazy lady with crossed eyes in those for some reason!  I will have to retake a picture in that dress because it did turn out nicely.


We had a great time on our Alaskan cruise.  I was mostly fascinated with the ice floes and glaciers.  These chunks of ice ranged from the size of an ice cube to the size of a small island.  The one below was about 20 feet across.  That dot on top is a bird.
Just to give you an idea of the size of the glacier below, look at the black dot in the upper right hand picture.  That is actually the boat pictured below it.  We were fortunate enough to have a balcony room, so we were able to take these pictures of Sawer Glacier from the balcony!  It is amazing how blue the glacial ice is.  We were told that when it is sunny, the glaciers are so glaring that you cannot see the color.  It rained almost every day of our trip and was overcast, so we really did get the best views.


I loved the excursions we took, and I think what I loved about them was that they took us outside into nature.  I especially loved the Alaskan Rainforest Sanctuary in Ketchikan.