Friday, August 11, 2017

Sewing Lessons

I have been super busy sewing, but not so busy posting. It's time to catch up! Last fall I started teaching my friend Sylvia to sew. We were planning a mission trip to Uganda and would teaching the women, so Sylvia needed to become confident in her sewing skills as well. She is a great learning and picked things up quickly. I think we started off by making some simple bags and then moved on to skirts, dresses, and tops. These were all clothes we needed for our trip.
Now she's a sewing maniac like I am, and we have lots of fun working on our sewing projects.

This summer, her daughter Gabby, who is an athlete, tore her meniscus during one of her workouts. She had to have surgery and stay off her leg for awhile. She expressed an interest in wanting to learn to sew and wanted to make a Kimono type cover-up/ jacket. I remembered that there was a cute Kimono pattern in Seamwork magazine, and when I showed it to her, she loved it.
You might notice that she is using my grand daughter's Janome "Hello Kitty" sewing machine, and she loves it!


 She ordered some fabric online, so as we were waiting for that to come in, I taught her how to make an apron. She really adapted quickly and did a great job on her apron.
Look at what a good job she did on all of that double fold bias trim!


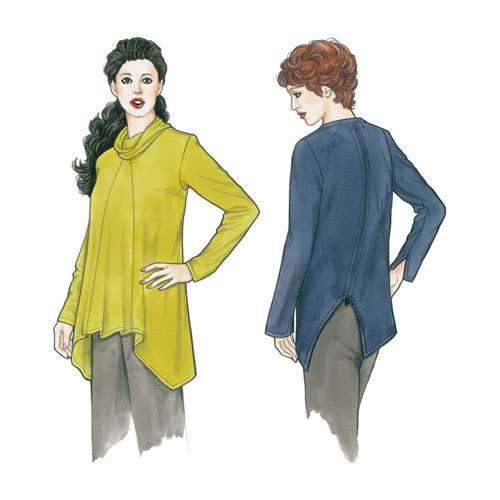
Next, we made a trip to JoAnns and she found some black lazar-cut lace that she liked and a floral print. I'm telling you, this girl is the Kimono expert! She eliminated the ties and shortened the length. Super cute!


Gabby's going back to school next week, but thank goodness I still have Sylvia as a sewing buddy!


African Quilt for Children's Home

On my last trip to Uganda in January, Sylvia and I were fortunate enough to spend some time with orphans at the children's home in Gulu.  The day before we went to the home, we were asked to make a quilt to be hung on the wall.  A quilt!  And they wanted us to be able to do it in less than 4 days.  We were a bit shocked and frustrated.  The man who wanted us to do this was an American and knew before we even arrived that this was the plan, but he neglected to let us know.  We had no rotary tools, or any other quilting supplies.  We said we would do our best, but couldn't promise to finish it. We were asked to have a square for each child that he/she decorated.  Well, we had no fabric pens and nowhere to get them.  The only thing to be found were some "permanent" markers that bled all over the place.  I was so sad to see how the colors ran.  We didn't do so hot at cutting straight panels since we didn't even have any kind of ruler or straight edge.  It was almost hilarious to see us trying to cut fabric on a rickety, uneven, and dirty picnic table with nothing but our flashlights for light.  I should have know right then and there to stop the plan, but we were determined to give it our best.
We had brought a new sewing machine with us from Jinja, so at least we could try to get everything done for the top so they could have something to see.

We had the children work on making pictures and we took them ( the pictures, not the children!) back to our "hotel".

Uganda Quilt project

Uganda Quilt project


Well, then the storms came.  We had no electricity for the next 3 days.  Not only could we not sew, it was raining and the only place we had to work was outside.  At this point, we decided that we had no other choice but to take it home and finish the quilt.  We've been home for almost 6 months and we finally finished the quilt. I am so thankful that my friend Sylvia was with me on this trip. Not only did she help with teaching and everything else we did, she was a great encouragement and helped me get this quilt finished!  I am anxious now to get this sent off and back to the children in Gulu.
Uganda quit for children's home in Gulu

Uganda quit for children's home in Gulu

Ta-daa!
Finished quilt


and the back...
Uganda quit for children's home in Gulu

I know the kids will love this and it will certainly brighten up their main meeting room. I love it so much, I'd love to keep it. But it will mean so much more to them. I can't wait to hear how they react to seeing their finished product.

Sunday, March 26, 2017

TSW Alex Top

This weekend I decided to make the Alex tip from the Sewing workshop.  I bought the pattern months ago for the Olive top, but after seeing the Atlanta Fashion show clip on Facebook, I decided to make the Alex first!


This is a rayon ribbed knit that I luckily picked up at our local JoAnns.  I checked the color against my color fan, and it fit right in, so I bought it!  I think it took me longer to trace and cut the pattern than it did to make it!


 I cut a small in the shoulders and tapered out to the medium at the underarms.  Even though I stablized the shoulders with fusible stay tape, I think the shoulders either stretched out, or they were just too wide for me.  Next time I will narrow them by about 1/2 inch.


Other than some gathering stitches and stay stitching, I made this whole thing on the serger.  I could have just serged the hem, but I like the look of turning it under and top stitching, so I did it that way.  I used a slight zigzag to topstitch the hem and sleeve hems.


My serger is quite old, but it works perfectly and I love it.  It doesn't do anything fancy, but it does what it is intended to, and it does it well.  I have a newer Brother 1034D, but I still prefer my funlock.


This is a great pattern and super easy to make.  The only problem I had was with the back.  The back is supposed to be gathered at the top, but my collar lined up perfectly without gathering anything, so I'm not sure what went wrong.  Either my collar stretched out because of the ribbing (most likely) or I didn't cut something correctly.  I plan to make this one again, so I'm sure I'll find out next time.


Oh, also, I ended up cutting 3/4" off the sleeves and hemming them 1".  I could still remove 1/2"  Normally I have to take an inch off of all sleeves, but I had to take a little more off of these.  (The pattern only requires a 5/8" hem, but I used 1"  In knits, I like to wait until the garment is made to hem the sleeves because you never know how much they will "grow" after making it.


All in all, I'm really happy with this.  Now to look in my stash for another knit before I put that pattern away!


Tuesday, March 14, 2017

Spring 6 Pac

It's time to start sewing for spring, and this means I need to have a plan.  I've decided to follow the guidelines on the SG site for the Spring 6 pac.  Here is the outline:

  • one jacket or cardigan in a neutral colour
  • a second jacket or cardigan in a second neutral or a colour
  • a skirt or pants in the same neutral as 1
  • a skirt or pants in a second neutral
  • a top in a print mixing neutrals or neutral and colour
  • a top in a neutral or your colour
I've decided to use olive and a copper/mocha/tan for the neutral color (both are kinda neutral)  I'll have to draw up a plan later, but yesterday I decided to start with the Loes Hinse Oxford pants. Years ago these were one of my favorites, so I decided to resurrect the pattern.  I'm using a burgundy and gold herringbone, which looks copperish blended together.

I love the way the pockets are constructed on these pants.


The legs are constructed by sewing the side seams first and then top stitching them (kind of like jeans.)  Then you sew the inseam and put the pants together.  All I have left to do tonight is to put in the elastic and hem them.  Of course, I think I will have to cut about 4 inches off the bottom before I do.  The pants are long enough to cuff, but this rayon fabric has been "growing" and will hang overnight before I put in the final hem.

Sunday, March 12, 2017

Hot Patterns Gypsophelia top

Yesterday Hot Patterns hosted the event "Sew Something Saturday."  Even though I didn't have any HP patterns in my near-future-line up, I decided to participate.  I looked through my pattern collection and decided to go with the Gypsophelia, which is a free download at Fabric.com.  The pattern calls for 2 yards of 60" fabric, but I was able to make it work with 1.5 yards and I think mine was only about 55 inches wide.  I wasn't able to match the pattern, but since this is an uneven pattern, I'm not sure I could have matched it without using double the amount of fabric - and I'm too frugal for that!  I used a rayon challis, which seems to be my favorite fabric to wear these days.

I love the look of this top on the drawing, but it does not look the same on me.  There is too much excess fabric around the middle, the sleeves do not hang the same way, and the keyhole is much smaller than shown (even though I cut my keyhole the next size bigger than the size for my pattern. )  I cut a 10 in the shoulders, and graded out to a 12 at the bust and hip.  I did no other alterations.


The keyhole with binding was easy to execute, but if I make this again, I would consider using self-fabric for the binding.  Prepackaged binding is usually stiff and not as pliable as I would like it to be.
The sleeves are also gathered and finished with binding.  I am going to cut my binding off and re-do the bottom of the sleeves.  I like the treatment, but although I used the measurements as given, mine are too big and fall down below the elbow.  If I have some black FOE, I will use that to finish the sleeves.  I am also going to re-do the hem because I did a lousy job at 10:00 last night and I know parts of it will come undone and fray.
As far as I'm concerned, the jury is still out on the dolman/kimono sleeves.  I'm just not sure if I like them or that they are flattering.  I did wear the blouse to church this morning and got several compliments on it, so maybe I'm over-thinking it.  I do think it is quite comfortable, and definitely fits a need in my wardrobe!  I felt like a big sack in this top (I wore it with a skirt) and so I belted it.  I like it better with the belt, but for casual wear, I'd like to not have to deal with the belt.  There are princess type seams in the front and back so I may play with bringing them in at the waist or else adding an elastic casing inside.  But for now, I'm wearing it as is!


Sunday, March 05, 2017

Tobin James Dress

It's raining and drizzly outside, and I have another hour until I need to leave for Sunday School.  I realized I have not written on my blog since before my trip, so it's about time!  I will be catching up with Uganda pictures, but that will be another day.  Today I bring you my Tobin James Dress!

This is the Etra Pattern from Tina Givens.  I don't usually make something in exactly the same colors as the envelope, but this time I was falling in love with that mustard linen.  When I saw the similar color at Joanns several months ago, I had to get it.  I decided to use an eggplant color (actually more of a dark red violet) for the trim.  So in that respect, I guess I did not use EXACTLY the same colors.

TG patterns usually leave a lot to be desired in the drafting department, but this one had no problems.  Well, I say no problems if you don't count the bottom trim.  Since the sides of the dress end at an angle, it's better if you cut the joining part of your strips at an angle as well.  Of course, if you don't, it gives you a different look, which might be your preference.

The one thing I always change in TG patterns is the pocket. I don't like her pocket shape since the top of the pocket seems to flap over.  If you are stitching the pocket to the front fabric as a design feature, then this shape of pocket will work, otherwise, I trim off the top "hump" of the pocket.

When I first saw the picture for this dress, I thought the black part was an underskirt or separate layer.  It is just trim sewn on, so the picture is a bit deceiving.  Also, the picture looks like it has an asymmetrical hem, but in reality, the hem is straight.  There are strings on the inside so that you can draw up one or both sides to get a different look.  Maybe that is what they have done here.

I'm calling this my Tobin James dress because I got this little sun emblem last year when we visited Tobin James Winery.  It is their logo.  When I decided to make this dress, I knew I had to incorporate it somehow.  I love how this design feature turned out.


I really like how comfortable this dress is and the sleeves really do fit well.  I often have trouble with sleeves being either too tight. or too loose at the lower arm.  These fit the way I like.  The neckline was too low and I raised it about an inch or maybe more.  I will raise it even more next time.  This fabric is medium to heavier weight linen, so I think I will use a lighter weight linen next time.  It is a lot of fabric.


On this pattern I cut a small at the shoulders and drew the underarm seam out to a medium.  I made no other fit adjustments.   I did try to add a dart, but I did not leave enough room for the dart leg, so I ended up easing in an extra inch of length in the front.  I'm not sure if it is needed, but next time I will try for the dart.


In addition to raising the neckline, I thought the neckline was too plain, and the gold, even though it is in my color pallet,  looked too blah against my skin. As an afterthought, I added a bias binding inside the neckline.  The inside edge is stitched, but raw.

I used the same finish on the hem strip.


Here is the dress with the ties done up on the sides.


I'm wearing this dress to church today, but when one of our friends came to pick up DH this morning, he commented "nice nightgown."  Hmmm...