Wednesday, August 24, 2016

Remake - cropped pants

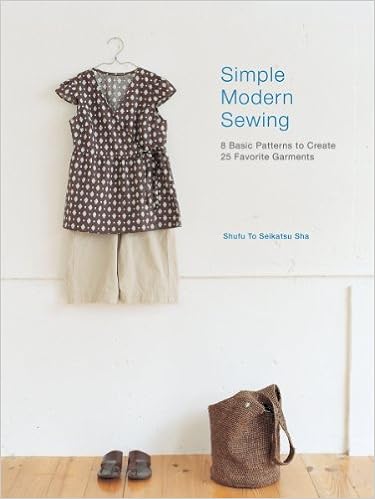
A couple of years ago, I bought the book, Simple Modern Sewing.  I think it was the first Japanese sewing book that I got.  I love the designs, but I especially love the simple, concise directions.  The first (and only so far) thing I made out of this book was a pair of cropped pants.  Well, I've worn those so much that they finally gave out - the fabric did anyway.

Fast forward to this week, my friend Maureen came over and we did a little sewing.  And what did we make?  Cropped pants of course!  The last pair I made were from linen and I loved them.  She made hers from linen, and yes, she is loving them.

This time, I made mine from organic cotton that I happened to find a JoAnns.  I love this fabric and want to go back and see if they have any more.  I think I saw it on their website once.  It is soft and has a nice drape. Besides that, I love the color!

According to my hip measurement, I should have made a large in these.  I actually intended to make a medium this time, but was not paying attention well enough when I was cutting and cut the small again.  The pattern has a LOT of ease.  It calls for 1/2" seams, so I made my side seam and inseams 1/4" since I neglected to cut the right size (can't talk and cut at the same time,)
I'm totally fine with the way they fit.  I wore them all day yesterday and I didn't have to tug at them or pull them up.  I may make another pair in a larger size, just so that I can see how I like them.  I think I want to make these in the long version also.  They are just so comfortable.


The back pocket piece came in the pattern, but next time I think I might make it a bit smaller.  In fact, Maureen and I were talking about doing another pair with inseam pockets instead.  I HAVE to have my pockets you know!


It looks like I may have had the pants twisted in the front when I took these pictures.  It's not fun being your own photographer.  They really don't have a big weird pleat looking thing in the front.

Thursday, August 18, 2016

Merchant and Mills Saltmarsh skirt

A couple of months ago, I started learning about Merchant and Mills.  I had seen several of their patterns on a variety of threads and was especially intrigued by this dress made by Ruth.  That post is what got me started looking at these patterns.  I ordered the 'Workbook" and love the vibe of the whole thing.


The patterns are printed on both sides of the sheets, but they are not overlaid on top of each other and they are easy to read.  Also, the sheets are not so huge that they are unwieldy.  They are about 1/2 the size of a BurdaStyle pattern sheet.  Much easier to use


Here are the patterns that are included.


When I saw the Saltmarsh Skirt, I knew that would be the first thing that I made.  I even had some great linen on hand to do it!  The color of mine is called Blue Bonnet from Fabrics-store.com


According to my measurements (which you have to convert from metric if you are used to US standard) I needed to cut the size 16, which I did.  Next time, I will cut it down to the 14.  There is ample room.  Also, next time I will add 2" to the length.  I have short legs, and even worn below my waist, I could not do the 1.25" hem as suggested.  I just serged the edge, turned it under and stitched to get it as long as possible.  It is the perfect length for me now with flat sandals.  The skirt looks fairly straight in the pictures, but it is actually more of an A-line.


I love the pockets on the sides and I like the way they were done.


This skirt has a separate waistband.  They have you thread the tie through the grommets after the waist band is attached, but I didn't do it like that.  I sewed the front of the waistband and then placed the tie against the fold, pinning it in place so I didn't accidentally stitch through it. Before pinning it, I used a safety pin to bring the ends through the grommets.  My bodkin would not fit.  You could also use buttonholes instead of grommets, but I really like the way they look.  I used the 1/4" grommets.  I really wanted brass, but they only come in silver or gold colors.


The waistband is then turned to the inside and you stitch in the ditch.  I recently bought a new foot for machine called a "fabric-joining foot"  It's designed for stitching (either zigzag or faggoting) two fabrics that are butted up to one another.  The little blade on this foot makes it super easy to stay in that ditch for the stitching.


The pictures I took of this skirt were after wearing it all day, in and out of the car multiple times for errands, in 106 degree heat!  I think it held up better than I did!  And yes, I love those pockets :-)

I love this skirt and actually had a stranger come up to me in the parking lot to tell me how much she liked my outfit.  (This made me feel especially good, because she was a lot younger than me and stylish looking.)  Even  the nurse at my doctor's appointment today was asking me all about it.  We got on a big discussion about linen and I told her that my favorite place to buy linen is at fabrics_store.com.  I definitely think I will have to make another one of these!

(The next time I wear this, I think I will adjust the gathers to be more at the center back and none at the side seams!  That's a pretty wide fanny view. )

Decorative Stitching on a pattern piece.

Good morning!  (Well, at least it is morning for me as I begin this post.)
Yesterday, I forgot to add how I did the stitching on the neckline.  I don't have pictures, but I can lay it out for you.


  • First, I cut out all the pieces except the two neck bindings.
  • I traced the neckbindings on the fabric (I had already cut out the two facing pieces.) and then interfaced the area that would cover the bindings.  I used a water soluble marker to trace them.  I did this because I did not know if the stitching would make the piece get smaller. 
  • Next, I did a couple of samples on smaller pieces of fabric to see how I wanted to get the design to lay out.  i bought a rayon thread that was close to the color of the fabric.  I wanted to bring out the yellow, so it is a little bit more yellow than ivory.  I think the tone on tone look is a little more elegant than contrasting stitching.
  • The fabric still seemed a little wimpy for all that stitching, so I used Solvy water soluble stabilizer on the underside of the fabric.  I used 505 temporary adhesive spray to keep the solvy in place.
  • After I finished all the stitching, I checked the size against the pattern pieces and cut them out.  They did not change in size - but I would always do it this way just in case!
  • I found that the added advantage of leaving the pieces uncut while stitching is that it is much easier to turn and manipulate the fabric under the presser foot.  I messed one up and tried it on a cut out piece and it was a nightmare!
  • Finally, I rinsed out the cut pieces by hand and let them dry before sewing them in.  This is unnecessary, but I don't like the feeling of the stiff stabilizer when I'm working with it.
My new Baby lock has hundreds of stitches on it, so I want to incorporate that into some of my garments.  This was a leaf and vine pattern.  I ran three rows of it with the middle row running the opposite direction.

Wednesday, August 17, 2016

S1253 - Earthy Rich Parchment

I have had this pattern for a while, thinking I would make view E.  As it turns out, I ended up making view B first.  I was in JoAnns the other day and saw this beautiful "parchment" colored cotton gauze.  I whipped out my color fan, and sure enough, it was the right color for me.  I have a couple of other cotton tops in a similar style that I've been wearing all summer, so I knew this would be the perfect pattern for this top.


I wanted to do something a little extra for the neckline area, so I used the decorative stitching on my machine and some rayon thread to give some texture to the neckline.  I like how it turned out.  I think that was the most time consuming part of the whole top!


The rest went together really easily.  I did make a few alterations.  One time a few years ago I talked with Loes Hinse in her shop in Carmel.  She suggested that for my figure, instead of doing a FBA or adding darts to an undarted top, that I add to the top of the shoulders in the front about 1/2" and to just make sure I have enough circumference across the bust.  So, this is what I did.  I added to the top of the shoulders in the front only and did nothing to the back.  I extended the armscye seam out to the size I needed for my bust.  I usually have to make the shoulders about 2 sizes smaller than my bust size.  This is a pretty forgiving pattern and the fabric is pretty flowy, so it definitely worked for this.  It will be interesting to see how well it works when I make one of the views that has a straight hem.  Another advantage of this adjustment for me is that it lowers the neckline.  I have a forward tilting neck, so I usually try to lower any neckline that is high.  This one sits perfectly on my now.


I also raised the front of this blouse a bit.  It wasn't hitting me in the right place, so I raised the front only.


I love this top, and the first time I wore it, DH and I were going out of town for the day.  On the way to his meeting, I managed to dribble coffee down the front of my top.  Arghh.  I got most of that out, but then we went to teppanyaki for dinner and somehow I got sauce on the front of my top!  No wonder I rarely where light colors!!  Thank goodness for shout and a little laundry detergent.  It all came out in the wash - phew!


The color of this top fits into my new color plan.  I am only supposed to wear my "whites" on one half of the body at a time, so a top in this color is perfect.  As you can see, this is about as light as I should go in the white category.  I am not a high-contrast person, so I would not wear this with a dark skirt or pants.  Something midrange is a little better for me.  The pants I am wearing in these pictures are a little light, but they are all I have right now that work. I'm going to be busy getting a lot of sewing done I hope!


Because of the contrast in the pictures, the top looks almost white.  However, in real life, it is almost exactly the color of the top swatch on the "conservative" page.  It's just a touch more yellow.