Monday, May 28, 2012

Silhouettes Classic Blouse


can't believe I'll be leaving for Uganda in just over a week!  I've been trying to get some sewing done so that I have something to wear on my trip!!  For that reason, I chose the Classic Blouse by Peggy Sagers because I knew it was fast and easy to make.  I'm pretty much a tank-top girl myself in the summer, but in the villages of Uganda, the women do not bare their shoulders or upper arms very often.  In fact, pretty much never!  So, I decided I needed some short sleeved shirts.  Also, in the city, you rarely see the women wearing T-shirts.  Usually they wear dresses, two piece dresses or suits.  Yes, I know that sounds surprising, but the one thing that always stuns me is how well they dress. Their clothes may be old and used, and "out of date" according to US standards, but in the cities you always see their clothes to be very clean (surprisingly white with all that red dirt) and neatly pressed.  The men wear long sleeved button shirts and slacks and the women usually wear fancy dresses.  And by fancy, I mean - think "prom"!  THis cracked me up the first time I went there.  Some women were wearing regular street clothes, most were wearing skirts or dresses, and some (many) wore the kind of dresses that we would only wear to an event.  We're talking sparkles, beads, satin fabric, lace, etc.  First of all, this shocks me because it is so HOT there and I can't believe these women would want to have all of these tight-fitting, long sleeved, heavy clothes on.  The other thing that is surprising is that out in the villages, the traditional dress for the women is something called a "Gomez"  This is a dress made with yards and yards of fabric wrapped multiple times around the body.  The typical fabric for this dress?  Polyester charmeuse!!!  Could we pick a hotter, non-breathable fabric?  It's amazing.  Many of the younger women wear a dress style called a Kitenge (not sure of the spelling)  These are more like a fitted two piece dress made from a wax print cotton fabric.  Of course, they are lined with broadcloth, so they aren't' a whole lot cooler to wear, but at least cotton breathes.  This dress style is more "modern" and I believe it comes from Kenya - but I've heard different stories on that too.
Well, I won't be wearing any Gomez's or Kitenge's (even though I have one) on this trip.  I will be wearing long dresses, long skirts, and short sleeved blouses or tank tops with a blouse over the top.  I picked a poly/cotto broadcloth because it is light weight and should pack easily.  Hopefully it won't need to be ironed.


I have made this blouse before, but knew I needed to adjust the size.  I cut a 1 at the shoulders and 2 at the bust.  I used the "D" cup pattern.  On the blue blouse, which was my second version, I lowered the point of the bust dart by 1/2" and raised (lengthened) the vertical darts in the back.  
This blouse does not have a cuff, but you fold the sleeve, make a button hole, and then fold the buttonhole over to the button.  I had to take this out the first time because the button ended up under my wrist.  If you want to make the long sleeved version of this blouse, I would suggest that you pin that out first before you make any buttonholes.  


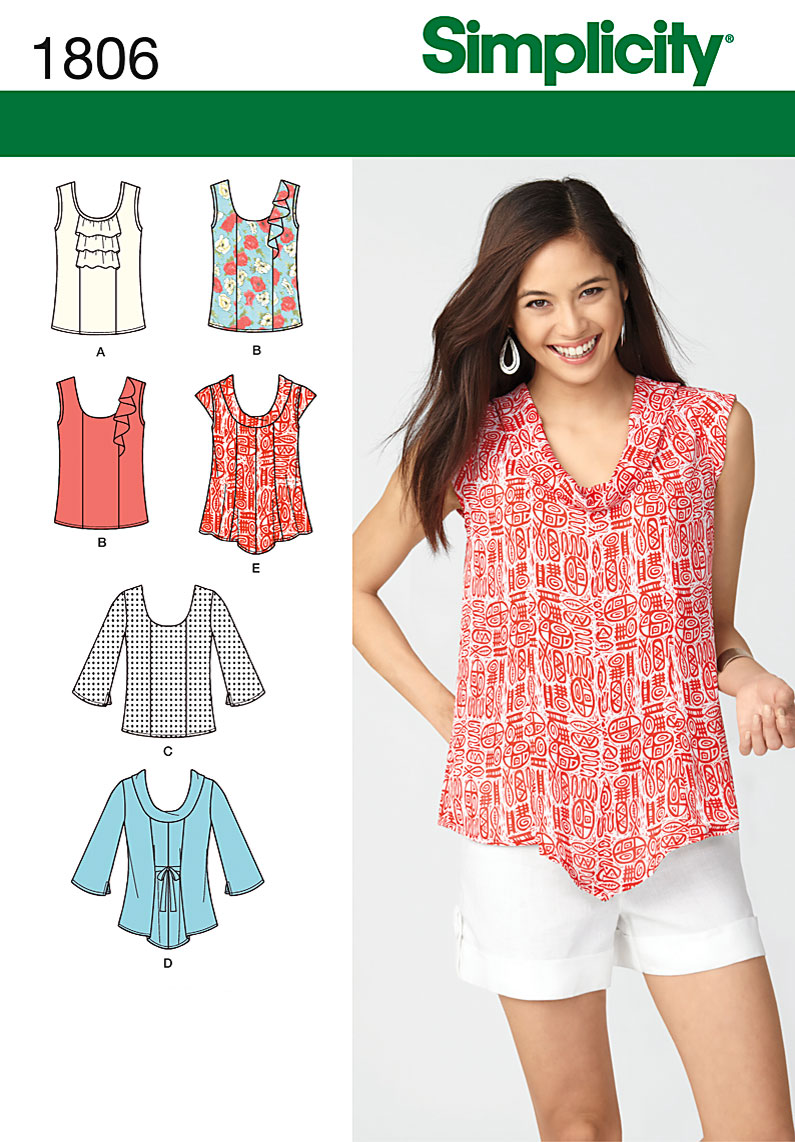
The collar on this blouse is one piece, meaning there is not a separate stand. At first I did not like this, but now it does not bother me, and it certainly is faster to make this way.
I will probably make more versions of this blouse this summer.  I have some silk I'd like to try for this.

Wednesday, May 16, 2012

The Africa Dress

Here it is - McCalls 3129.  In the last few years that I've gone to Uganda, I have taught the women how to make skirts and bags.  Last year I worked with three women in particular, Kathy, Florence and Phoebe, and taught them how to make children's, shorts, shirts, and a simple shift for girls.  I asked them what they wanted to learn next.  Well, they said "pants", but I think I would start an uprising in the village if I started the women wearing pants.  I don't even wear pants when I go there!  So, they said they would like to learn to make dresses.  I decided to find a pattern that would be very basic, could be made long, and would have princess seams or darts.  I found this.

I also wanted to make a long dress to take to Uganda this summer, as I usually wear skirts and tops.  A dress is just easier.  I had a few patterns picked out, but then I thought, "I better make the dress I am planning on teaching them to make!"  I had this fabric that I bought last year in Kayunga District and decided to use it.  I also decided to make it exactly how I will have them make it.  Well, I didn't use my treadle, but I did only use straight stitches and no serging!  I did, however, press as I sewed, which probably won't happen there.  The iron's in Uganda have to be filled with hot coals from the fire - well, at least in the villages.

This year I will also be teaching my friend Betty.  She lives in the city of Kampala.  I will be buying her a sewing machine when I get there.  Thank you for those of you who have donated to support this trip.  It is so greatly appreciated.  It is because of your donations that I can buy Betty and machine and fabric.   I still have a way to go to get all of my support, so if you would like to help, check out this post.  For the villages, we always use treadle machines.  Betty may want a treadle or electric.  I will find out when I get there.  But, either way, I still tried to make my dress as simply as I could.

I just turned facings under and stitched, and did a hand picked zipper. Most of the treadle machines have only one foot, so it's not much extra time to put in the zipper by hand - and much faster by hand if you end up having to rip out the machine zip and do it over!  I have a few princess dress patterns, but I like the neckline on this one.  The women there do not wear anything low cut, and this dress is high enough to be modest, but not so close that you feel like you are choking.  I chose to make the dress with sleeves since most of the women in the villages do NOT go sleeveless.  It is different in the cities though.

Surprisingly, this dress went together pretty quickly.  I did a FBA and lowered the shoulder a bit.  I probably need to lower the bust curve a bit (darn gravity!) and maybe add about 1/2" to the bust circumference.


Saturday, May 12, 2012

Summer Top

It seems to go from Winter to Summer in just a couple of weeks here.  It's been in the 90s all week and looks like more of the same next week!  I'm not complaining though, I'm one of the rare ones around here that would rather have the heat than cold.  Even though I don't have the arms I did even 10 years ago, I still love sleeveless tops!  I need to make a lot of sleeveless and short sleeved tops since our hot weather lasts well into September and even October.  This is Simplicity 1806.  I was drawn to this pattern for a couple of reasons.  First of all, I really wanted to find tops to make out of wovens.  My favorite summer time fabric is cotton lawn, so this will be perfect for that.  I also like the princess seams.

While making this top, I realized that the "princess seams" are not quite that.  It is more like a center panel.  However, the FBA is still done the same way, and I really prefer doing a FBA with princess seams rather than having to deal with super big darts.


In this method, you slash the side front about 1-2" down from the armhole seam from the front edge just to the seam line.  You spread the front edge apart at the seam line 1/2" for each cup size above a B.   So, for a D cup, you would spread it one inch.  This creates a greater curve at the front edge.  Next, slash the Center front piece across the same spot and spread the same amount.  Because I have narrow shoulders and a large bust, I just trace my size at the shoulder (determined by upper bust measurement) and then continue the armhole out to my bust size at the side seam.  I have tried other methods for doing the armhole, but this one works best for me - of course, it depends on the pattern.

Right now I'm trying to make sure that I have all of the pieces I will need to take with me to Uganda.  Since I will mostly be wearing long skirts, and most of them are printed patterns, I need some solid colored tops.    I looked through my stash finding all kinds of prints that I wanted to use to make this top, but eventually fell upon a piece of embroidered lawn that I had left over from a shirt I made a couple of years ago.  I thought this would be a good one to try out the pattern.

This pattern is pretty easy to make.  The ruffle is cut as a flounce and is easy to insert.  The neck edge has a facing on this view, but binding on one of the other views.  I did use the facing, but cut it out of a lining fabric as I thought it would be too heavy with all the embroidery.  Next time I would probably just bind the neckline.  I'm not normally a fan of facings unless they are stitched down.  This pattern also has you bind the armholes, but I just serged them and turned them under.
I need to do a little tweaking on this pattern, but all in all, I think it's a keeper!

Monday, April 30, 2012

Would You Like to Help?

In less than 6 weeks I will be taking off to Uganda again.  For anyone new to my blog, this will be my fourth year going into the slums and villages of Uganda to teach women to sew.  I am excited about the new opportunities God will give me this year to encourage these incredibly strong women.  Several of you have asked, "How can I help?"


  1. Pray for me and my team.  Conditions are going to be, well, uh, shall I say "challenging" this year.  We are staying where there is no plumbing, no running water, and no electricity.  (I can go without electricity, but I really like a toilet!)  Pray that we would have good health and good attitudes.
  2. Pray for the women we will be working with.  There is, of course, the language barrier which makes teaching challenging.  Pray for their health and willing hearts.  Their circumstances are beyond most of our realms of imagination.
  3. Financial Support.  Our trip will cost close to $3000.  Each.  My 25 year old son is going with us this year to give medical and physical therapy support.  He will also be helping with any kind of manual labor that needs to be done, and there is always plenty of that!  Since he is a starving college student, we will be covering his expenses as well.  We have raised part of our support, but are not even half way there yet.  Last year many sewing supporters gifted me with financial support in increments from $5.00 up to several hundred dollars.  Please consider sending a gift.  Every little bit helps and adds up fast.  Donations can be made in several ways.
    1. Pay pal - probably the easiest.  My email address is nwinning at gmail dot com.  Donations can be sent directly to this email address through paypal.
    2. Directly to International Messengers.  If you would like a tax deductible receipt, make your check to International Messengers and include a note that the donation is designated for Nancy Winningham (or Nick Sanchez, my son)
    3. Mail a check to me.  Many expenses are incurred after we arrive.  Purchases like fabric, machines, and supplies are much cheaper there, but we pay cash, so the money sent to IM does not cover this.  (It does cover air fare and camp costs though)
  4. Would you like to go?  You might be praying about whether or not this is something that God would want you to do in the future.  I plan on doing this for many more years, so let me know if you are interested in learning more.
I really appreciate the support, prayers, and encouragement.  It is almost like we are all going together.  Last year the women I worked with were so amazed at how so many people would come together to help me get there to be with them.  They were just in awe and very thankful.  They are so thankful to know that anyone thinks about them or even knows they exist.  It's pretty amazing.


This is our team. My son, Nick on the right.  (Kind of an old picture, but I don't have any others right now that I can find!)

Below, Karen, Bea, and me.


Saturday, April 28, 2012

A Reversible Skirt

I am getting ready to go to Uganda and wanted to try making a reversible skirt.  I figured I would use two sheer fabrics that would be light weight, but solid enough that they could act as a lining for each other.  I had this border print fabric in my stash that I got in Mazatlan a number of years ago and figured it would be perfect.  So, I made a trip over to JoAnns to look for something to go with it.  My daughter picked out the pink fabric, so I went with it.


I've made the CJ A-line skirt before, so I wanted to use that pattern.  Since I'd be cutting the fabric on the crossgrain in order to utilize the border, I had to think about the sizing.  I checked the little chart that comes with all the CJ patterns.  It showed that I would need to make a 14 in order to have enough circumference around the hips, so that's what I cut.  (Well, I had already cut the pattern a smaller size, so I just guestimated the added seam allowance.)


Since both fabrics are sheer, I used French seams on both.  I should have trimmed the seam allowances better on the pink fabric, because I do have some fringy poke throughs.  The blue turned out fine though.    I sewed each skirt separately, then joined them right sides together at the waist.  I then treated the two fabrics as one and made a casing at the waist for the elastic.  I thought about just using the two fabrics as each side of the casing, but the fabric was too sheer and you could see the elastic.  I wanted the border fabric to peek through at the bottom of the other skirt, so I made the pink skirt 4" shorter.  I used a rolled hem (serged) on the blue fabric since both sides would show.  I used a regular narrow hem on the pink fabric.

I think this skirt will be great for my trip since I will be able to get double the mileage out of it.  The fabrics are polyester, so they will wash easily and dry without wrinkles.  Poly is usually hot and makes me sweat, but I've found that the sheers are more breathable, and since this is a fuller skirt, I think it will be fine (even though it's pretty hot in Uganda.)


Now I need to make some tops to go with the skirts!

Wednesday, April 11, 2012

Easter Eggs and Dresses


Well, my Easter dress did not get finished, but little Miss Emma's did! I used the same pattern as for her last dress (M5791), but omitted the hem band and sleeves. I also left off the tie in the back. Although I love the look of the tie, I can't imagine that it is very comfortable to have that knot in the middle of your back when your sitting in a car seat or booster chair. Instead, this one has a purple ribbon for trim, and that's it. Grace picked out the fabric, and she loved the dress. I think Emma loved it too since she grabbed it and played with it a lot. Of course, she Christened the dress by spitting up all over it, but that's what babies do!

This was little Emma's first trip to church, and she had to make a big impression by fussing and crying the whole time she was there. Oh well.
All in all, it was a great day, albeit that last day of my vacation and sewing time.


Here's some more info on Emma's dress. The dress is lined, and this time I lined the whole dress and not just the bodice. Unfortunately, I miscalculated the length of the lining and cut it too short. I ended up making a narrower hem and adding lace to the lining to help lengthen it, but I still wish it would have been about another inch longer.


For the leg and waist elastic, I did it differently this time. Instead of using seam binding and encasing the elastic, I served it to the leg and waist edge, turned it under, and stitched. This saved quite a bit of time on the panties.


Here she is showing off her panties!

Tuesday, April 03, 2012

A dress for spring


I'm not normally a fan of polyester dress fabrics, but I really liked this poly charmeuse and knew it would be perfect for this dress. The pattern is McCalls 6277 I decided to go with the V neck and the sleeveless version for my first attempt. The dress is completely lined and super comfortable. One thing I'm going to change (OK, two) is the armhole. I need to make the front narrower above the bust so that the armhole is not cutting into my arm. I also need to lower the bust point about 1" I've made adjustments on the pattern, so we'll see when I make the next version. Since I really don't know pattern drafting, I'm never quite sure when it comes to making this type of adjustment.
This dress has a side zipper and I liked the way it was put in. It was super easy and I like it better than having one at the back. The top of the zipper always bugs me at my neck, whether I use an invisible zipper, use a hook and eye, or not. After I wear this dress for a day, then I'll see if it bugs my arm hahaha!
Only a few days of vacation left and lots of sewing projects. I'm going to the outlet center tomorrow, so there will be no sewing since that is an all day trip. I'm hoping to make another dress out of this pattern for Easter, and Emma's Easter dress by Friday. If I get those done, then I have lot's of other projects I want to get to.

Saturday, March 31, 2012

Spring Sewing


Finally I have been getting some sewing time. Of course, I have also had house cleaning time, errand time, and Emmasitting time. Yes, I am on Spring Break! Yahoo!!

First, I made the little Emma a dress. This is the "practice" dress for her Easter dress. It's a bit big, so I'm glad I made a practice first.
I used McCalls 5791. Making Baby clothes is a lot like making doll clothes. Lots of little curves and places that don't fit easily under the presser foot. And even though I bought on sale fabric for this dress, by the time I bought bias tape, a zipper, elastic and thread, the dress was over $25.00. Baby clothes are so inexpensive in comparison, it would have been cheaper to buy it. But then, it wouldn't be hand made with love! (not to mention one of a kind)


Of course the dress has cute little matching panties and a headband. I made a headband out of each fabric just for fun. Since Emma is pretty much bald, she wears a lot of headbands and bows!


As I went though my enormous fabric stash, I found that I had NOTHING that I wanted to use to make an Easter dress for myself. In fact, I realized I have very few spring-like fabrics. The few that I do have are earmarked for a couple of other projects. So, after a trip to JoAnns, I decided to pull out what I do have and plan some spring sewing. I have a few more wintery things ready to go, but I think our winter weather is over!

Here you see fabric for (top to bottom, a jacket to go with a skirt I finished last week, my Easter dress, another spring dress (which will be used to practice for the Easter dress)some lining, Emma's Easter dress, a blouse, and a reversible skirt for my trip to Africa. I hope I get a lot of sewing done this week, but I also have a lot of plans.

Monday Nick and I are going to get our shots for the trip and I'm looking forward to spending time with him for the day. On Tuesday I'm helping a dear friend alter her mother-of -the-groom dress and doing some paper work. Wednesday a group of us are taking off for an all day trip to the Gilroy outlet center. That doesn't leave a lot of time for sewing and all the other stuff I have to get done. I must go into work at least 1/2 day, but I'm already pushing that out of my mind!!
Oh, and here's the little darling. I can't believe she's already 5 months old!

Sunday, February 26, 2012

Uganda on My Mind

I am so excited about what is happening in Uganda. Last year was my third trip to Uganda to teach sewing to the women of the villages. I worked with 3 ladies in particular on how to make children's clothing. We purchased 3 treadle sewing machines and asked that they practice their skills by making clothing for the children of the village. You see, in Uganda, there are many orphans. In the villages, many people die from aids, malaria, and other illnesses. When parents die, the other villagers take care of the children. The problem is that they are barely able to provide for their own children, so many of the orphans run around with no clothes, or clothes that are so badly torn you wonder , "Why bother?"
A few weeks ago, our fearless leader who is now living in Uganda, John Pipes, came for a visit to Visalia. We had a wonderful visit and set plans in motion for another trip this summer. So many exciting things to tell you!

  1. The women of the village that we worked with have now made clothes for all of the orphans in their village and even more children! This is such a blessing!
  2. The women have started their own outreach by mending clothes for others in the village. There is a resource center in the village of Busanna where many people gather. Two of the sewing machines are housed here and people are bringing clothes that need mending and the women are doing it for them!
  3. We have another lady from our church joining us this summer named Bea. She is maybe 80 years young and full of spunk. She will be a fun person to have along.
  4. I am so excited that my son is going to be joining us this year! He is 24 and in pre-med classes at Fresno State. He will be working with people in the villages that are in need of physical therapy or other medical support.
  5. We are hoping to do our bible study this year with the women on God's plan for trials in our lives. I can't think of anything that could be more supportive. We will be using the book of James.

Does this sound like something you might be interested in? We have room for one or two more people to go. If you are a believer and have a heart for missions or the people of Africa, I would ask that you ask God in prayer if this is something He would want you to be involved in. If you are interested in knowing more, you can email me at nwinning at gmail dot com. We will also need prayer warriors and financial supports, so pray about that too! I will be giving more information for that soon.

We are planning our trip for somewhere around the 6th of June and going for two weeks.


I am getting so anxious for our trip this year that I'm already thinking about packing. This year I want to take a lot less stuff so that I can fit everything into one bag. I'm hoping to take only 3 skirts (after all, most of the women there only own one or two skirts) and about twice that many shirts. I'm planning on making the skirts reversible so that I can have more mix and match options, but still not have a lot of weight in my pack. The first skirt I am considering is the A-line skirt from Christine Johnson. It has two seams in the front, two in the back, and no side seams. It has an elasticised waist. There was an interesting article in Threads this month about combining fabrics to change the hand and weight of the fabric. I think this would work really well to make a reversible garment, so I'm going to give it a shot. I'm going to use a knit on one side and a rayon crinkle georgette on the other.
I also have some other fabrics pulled out of the closet that I would like to use to make two more skirts. You rarely see the women in the villages sleeveless, so I'm thinking maybe of doing tanks with light weight over shirts. I want to take things that are easy to wash out and dry quickly since I usually hand wash laundry almost every night. Travel clothes are really expensive if you go to sites like exofficio.com or Magellans. They are great clothes, but it would be so much cheaper if you could just find the fabric and make them yourself. I haven't found a source for the dry flight fabric, but many of the skirts are made out of polyester, nylon, or cotton lawn. I've even seen travel skirts made from Liberty lawn! The weather is hot and humid there, so I definitely need something that is cool, breathes, and is light weight. I will not have access to an iron (they do have the kind that you shovel in coals from the fire!!) so I'll have to go with fabric that doesn't wrinkle. Suggestions?

Saturday, February 04, 2012

DIY disenfecting wipes


I have found that it really does help to wipe student desks down regularly with disenfecting wipes. Usually I have a lot of generous parents who will donate such things, but not this year. I think I've only gotten one or two boxes of Kleenex all year! The disenfecting wipes are expensive when you think about wiping down 30 desks. Right now we only do it once a week, but really it should be done every day! So, I decided to go on a hunt for a recipe to make my own.
After seeing a great pin on Pinterest for homemade baby wipes, it inspired me to try to do the disenfecting. I googled DIY disenfecting wipes and got a lot of hits. I read many of these and watched a couple of videos before coming up with my own solution. Ready??

First of all, get yourself 2 containers. I found some ziplock 7 cup containers, but would like to find something a little sturdier for the future if I continue to do this.

Next, assemble your ingredients. You will need:
Paper Towels - I used Bounty, but I understand that Viva works well and doesn't mush up either
1 cup white vinegar (for disenfecting properties)
2 cups water
1/2 cup isopropyl alcohol
squirt of mild soap or detergent
essential oil - I used Tea Tree oil for its disenfecting properties. Lavender and Grapeseed extract also are disenfecting. If I would have had some orange essential oil, I would have added that for fragrance.

One of the videos I watched said that you need the alcohol to kill flu germs, so I added that. I number of the recipes I saw just used vinegar for the disenfectant.


  • Cut your paper towel roll in half. This was kind of a mess. One website suggested using a NON serrated knife to avoid all the fuzzy mess. I'll try that next time.


  • mix up the solution. I only mixed up 1/2 of the solution at a time so that I would pour the same amount in each bowl.
  • place the paper towels in the bowl and pour the solution over the top. They don't seem like they will fit, but they do.


  • wait a few minutes for all of the liquid to be absorbed, then pull out the center roll. I read that this was easier to do when wet, but I didn't believe it. I tried to pull it out when the roll was still dry and couldn't do it. It was super simple after the roll was wet.
  • pull a paper towel out from the middle of the roll, then smoosh the whole thing down so that you can put on the lid.

THAT's IT!! I didn't want to mess with making a pull out hole, since I never use that anyway on the ones that you buy. I'll just pop the lid off and replace it when I'm finished. I can't wait to take these to school and try them out!

Thursday, January 19, 2012

SWAP update


Well, I wish there were more to update, but there isn't much.

I have finished 3 things for the swap. First of all, the "Dana's Top" by Silhouette patterns. This turned out well despite the fact that my fabric did not have enough stretch. I will probably make this one again.

Next, I finished the e-shrug by Sewing Workshop. I made the longer version, and added long sleeves. Still not sure if I like the longer sleeves, but it is nice and warm with the longer sleeves. I used a wool knit and it really is nice.

Last, but not least, I finished the funnel top by Christine Jonson patterns. This is super quick and easy, UNLESS you cut the neck too small and then the darn thing won't go over your head! I can't believe it. So, since I made this whole thing on the serger and only used the regular machine to hem the bottom and do the fold-over stitching on the neck, I think I was not careful enough with the width of my seam allowances on the neck. My serger is over 20 years old, so the seam gauge part is not easy to follow. I did pick out the straight stitch on the neck and restitch it. It is now able to go over my head, but not very easily. One of these day's I'll probably rip the poor thing. I do like the top though, and will definitely make this again.


Now that I can finally get the top over my head, I can see that it is too tight just about everywhere else. I did use the guide sheet for knits included to determine what size I needed, but I think I really need to do a FBA. Unfortunately, this will mean cutting the pattern out flat, since as is, the pattern front and back are exactly the same and you cut them both out as one. I will just need to make 1/2 patterns and fold the fabric with 2 folds to get a different front and back. As is, it can stand as a layering piece, but it is a little too tight and sheer to wear as a stand alone. AS it is, I had to wear a cami underneath so that my bra didn't stand out like neon lights!

What's next up? Well, tonight next up is grading some papers and watching American Idol! But, hopefully this weekend I will get to do some sewing. I really should cut out the coat and make that since the weather is getting colder. Not sure why I keep putting it off. I think it's because I don't like my fabric. I like the look and the color, but it is pretty heavy and unfortunately, scratchy. I will need to figure out a different fabric for the collar since I don't think I would want that scratchy wool against my neck. I already have one coat with a fur-like collar, so I'll have to think of something else.

Saturday, December 31, 2011

SWAP 2012

The SWAP (Sewing With a Plan) has begun over on Stitcher's Guild, and I'm in. The emphasis for this year's swap is to make garments that are well-fitted and will become TNT (Tried and True) patterns. 2 garments can be previously sewn, and here are the basic rules:
Choose any seven garments from this list:


Button Down Shirt w/Collar
Blouse or shirt (collar is optional)
T-Shirt
Vest
Overshirt
Dress
Jeans
Trousers
Shorts or Capri Pants
Skirt
Jacket (jean jacket, windbreaker, hoodie, etc.)
Coat (suit or sport coat)
Overcoat or Raincoat
Bathing Suit & Coverup


From those seven, choose four to make twice for a total of 11 garments that will work together. Those four may either be repeated garments from the same pattern, or one each from two different patterns.

You can see the complete rules here.

I think I've only actually completed one swap, although I have attempted a few. I'm hoping to "make it work" this year. I did not do 2 of the garments ahead of time, so that means I need to really get busy. I did make a "practice pair" of the pants and the Licorice dress. I have also made the coat before, but it is much too big now. I think it was a little too big when I made it the first time! Wow, I just looked back through the blog to find the picture of the coat and realized that it's been 5 years since I made that coat. I guess it is time to replace it. The new one will be a plain taupe colored wool. However, I LOVE the fabric of my gray coat and wish there were some way to salvage it. I guess I could take the whole thing apart and try to recut it. That would probably all work fine except for the buttonholes will make it tricky to recut the coat. And, I don't know that I'd ever be able to match up the pattern again either.

Well, for this year, this is what I'm planning..


The Burda jacket I also made years ago. I'm thinking about taking the Classic French Jacket class at Pattern Review. The class is $53.00 for memebers. One of my early Christmas presents was the Threads archive DVD set, so I may just follow the instructions in the past issues of threads on how to make a Chanel jacket. I haven't decided yet, but need to since the class starts on Jan 5th.