Showing posts with label Endless Combinations. Show all posts

Tuesday, May 10, 2016

Seaside Sue (Stylearc asymmetrical top)

This week I've been working on finishing up my entry for the Endless Combinations contest at PR and getting ready for PR weekend.  I finished the last thing yesterday, which was the Seaside Sue top from Stylearc.  I'm really happy with this top and how it turned out.  Of course, I love wearing rayon jersey and I was desparately needing a couple of black tops in my closet.  So, now I've got one me-made solid black top!

This is the first time I've worked with Style Arc patterns.  I love the look of their styles and since they ship from Australia, I was happy when I found out that I could order PDFs from their Etsy shop.  What I didn't stop to think about was that they use size A4 paper, not 8.5x11.  It does make a difference in printing.  Although it didn't throw the pattern off any, I did make it more difficult to line up the pattern pieces.  As soon as I finished taping that thing together I went on Amazon and ordered a ream of A4 paper!


I love the look of this top.  V necklines are my best look and I especially like the asymmetrical hems front and back.  I used the cover stitch to finish these.


This pattern had VERY FEW directions.  Basically said "Sew the front and back together. bind the neckline.  Finish the armholes and hem."  No how-tos, no given seam allowance, no measurements on the pattern.  There are good registration marks for putting the pattern together and a map, but as far as actually sewing the top - not much.  I had to look up how to bind a V neck since I had not done it in a while.  I wanted to do a cross over binding, but didn't cut my binding piece quite long enough, so I had some problems with that.  Other than that, everything was pretty easy.  No darts, which I could have added, but I think its fine without them.  Linda Maynard's book has some great information on how to bind necklines.  Too bad I couldn't find it when I wanted to use it.  Sigh....

This was the last piece in the Endless Combinations contest. In this contest each piece needs to go with whatever the previous piece is.  I kind of rearranged my order since I incorporated the red jeans, but that was within the rules.  I'm glad to have made all of these pieces over the last 6 weeks.


 I've really been needing a black top and I like the way it goes with the red jeans.  Black tops go with just about everything, don't they?  I also want to make another black jersey top out of the Eureka pattern.  I have lots more to say, but I've got to finish laundry and pack.  My next post will be after PR weekend!


Friday, May 06, 2016

Red Jeans

it is getting close to PR weekend and I’m trying to get some last minute items made up for the trip.  There was a suggestion that we all make red jeans from the Jalie Eleonore pants pattern to wear on our shopping day on Saturday.  I just happened to have some red stretch leopard jacquard that I bought a couple of years ago originally intending to make a pair of Colette Clovers from it.  It is not really my first choice for making jeans, but I didn’t have time to order red stretch twill and our local JoAnns did not have any, so leopard red jeans it is!

I made a muslin first according to my hip measurement and it was too small!  I could barely get those things pulled up.  I decided to try again using a bigger size and adding 1” to the crotch length (depth?  I always get them confused) front and back.  I like the details on these pants and they definitely do not look like pull on pants.


The next size bigger did fit, and it turns out I did not need to add that 1”.  Even though I took the waist in a total of 1-1/2 inches, I still need to take it in more.  I’ve worn these all day today and it seems like I keep tugging them to pull them up.  I’m not sure if they are still to tight in the thighs and that is what is pulling them down, or if it is some other fit issue.  I have had this same problem with RTW stretch woven pants before too.


Thursday, April 21, 2016

Eureka!

If you are a fourth grade teacher in California,  you know that "Eureka!" means "I have found it!"  And what have we found?  Gold of course.  Well, Eureka is the name of this pattern by The Sewing Workshop, and that is the way I feel about it.  I would have never chosen this pattern based on the line drawing (just kinda blah) but I'm loving this top!  Now, I'm not sure if that is because of the pattern, or because of the fabric, but either way, it's definitely a win!

I was looking to make an overshirt for my Jacqueline slip, and originally I was going to use another knit and another pattern.  But, for some reason, I decided to do this one instead.  The fact that this top only takes one yard of fabric made it a little challenging.  I hate to cut one yard out of a longer piece unless I know something else I want to make out of that fabric.  Do any of you get stuck like that?  It's kind of ridiculous because that fabric is just sitting there waiting to be cut, and yet, I don't want to do it!

Any way, I found exactly one yard of this fabric in a drawer.  It's a beautiful rayon double knit/ sweater knit and I have no idea where I got it!  It looks like something I might have gotten from Casual Elegance, but I really don't remember.


This pattern was fast and easy to make.  I love how the neckline is done, although I didn't follow the directions in the pattern.  They have you mark a line on the band and line that up with something and it just sounded complicated to me and an extra step.  Basically, if you sew the band to the neckline with a 5/8" seam you'll come out with the same result.  I can see why they do it the other way, and maybe if I had done it that way my band would be exactly the same width all the way around, but I'm OK with a little imperfection on something like this.  I still think it looks pretty darn good.

The sleeve bands are sewn onto a kimono/cap style sleeve and give it a nice look.

I did use my serger to put this top together, but on the neckline, I sewed the binding on with the sewing machine first and then trimmed it with the serger.  I'm really loving this top!


Thursday, April 14, 2016

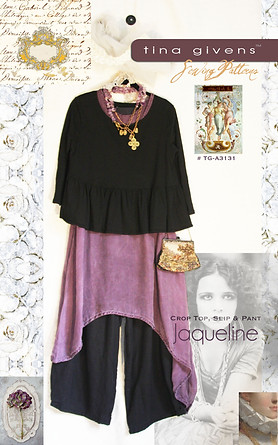
Tina Givens' Jacqueline

Lately I have really been intrigued with Tina Given's Patterns and the whole Lagenlook trend.  I've steered away from it before because I know someone who REALLY likes this look, but most of the time it looks like she found everything she could and threw it all on at the same time.  Not the look I'm going for.  However,  I've really been liking the looks of Vivid Linen, Eileen Fisher, and a few others that have a little more classic look on this trend.  So, I bought the Jacqueline pattern, which I think is just lovely.


Before summer hits, I would like to make the slip part of this pattern in a light weight linen, as shown.  Since I am doing the endless combinations contest on PR, I wanted to find something that would go with the LH pants I made recently, AND I wanted to use fabric that was ALREADY in my stash.  I found this sort-of batik print rayon challis in my cupboard and knew it would be perfect.  This pattern needs something that will drape and flow, and this fit the ticket.  I'm very happy with how it turned out.  (It was a little windy when I took the picture, so you can see my skirt blowing out on the left or my right)
Untitled

This pattern is available as a PDF or printed pattern. I ordered the printed because it was on sale. Unfortunately, I still had to tape the pieces together, which was a little annoying. Granted, the sheets were about 3 times the size of regular paper, but still!

The armholes were REALLY low on this pattern, so I basted the shoulder seams 2" lower and recut the neckline, I want to be able to wear this as a top without another top or cami underneath during the summer. I should have made that 3", so I will correct that on the pattern.

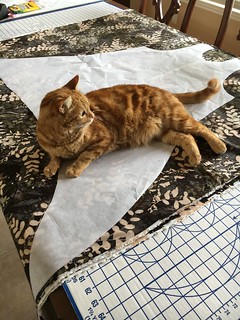
The neckline and armholes are finished with self-bias, which is not unusual and my preferred method for finishing. What was interesting is that the hem is also finished with bias binding. I have never done that before, but I like how it turned out.  I have more pictures in my Tina Givens Flicker Set. (Click on the picture of the cat and it will take you there.)
Untitled


Tina Givens

Sunday, April 10, 2016

Endless Combinations Item #2 - Ascona Cropped Pant

Earlier this season I purchased several fabrics from Casual Elegance in hopes of making a spring wardrobe.  Well, I'm starting to see it come together!  This is item #2 in the PR Endless Combinations Contest.  Item 2 must go with item 1.  Item 3 must go with item 2, etc.  So my first piece was the sweater knit top in my last post, and this is item #2.  I've made Loes Hinse's Ascona Pant several times and really like it.  The fabric is super nice looking and drapes beautifully.  It is a poly-rayon blend, but I don't know the percentages.  It must be more rayon than poly though, because it seems to wrinkle/crease fairly easily.  I'm also loving the carmel color on these.

I tried to hem these pants using steam a seam.  Then I noticed that one of the legs wasn't falling smoothly, so I pulled it apart.  When I tried to re-adhere it, it wouldn't stick, so I used stitch witchery to fix it.  by the time I got home from church, my other pant leg was falling down.  I've never had a problem with steam a seam before, but this time it was just not sticking.  I will probably go back and hem them by hand.

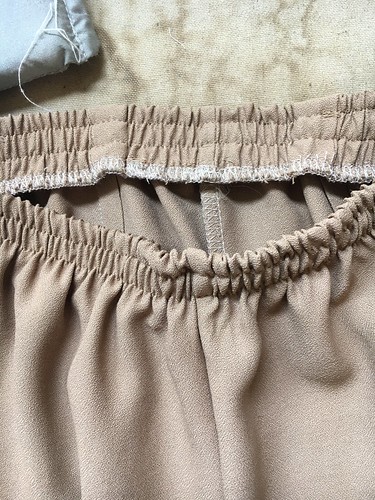
I've mentioned this before, but Loes Hinse taught me a cool trick for sewing on elastic when your hips are much larger than your waist.  I use 1/5" elastic and serge it to the wrong side of the pant.  I then fold the right side in and down to bring the elastic up to the fold (This part is all the same as her standard waist finish, except that she uses 1" elastic.

 Now, this is what is different.  Instead of stitching 1 and a half inches down, only stitch down 1"  This gives the look of a 1" waist casing but the added elastic flares out to the hips, but is not stitched to the top layer of the pants.  I'm not sure why this works better, but it seems to work for me.  Also, this time, I used Louise Cutting's stitch through elastic and did the same thing.  BUT, I stitched 1/2" down and 1" down.  I'm liking how this waist band turned out and it's not to gather-y around the waist when worn.
Ascona modified waist treatment

Sunday, April 03, 2016

Out With The Old...

In with the new!  Today is Sunday, so I took a break from Closet Bootcamp, but believe me, I'll be back at it tomorrow.  Now that I have really whittled down my tops and dresses, I realize that I don't have much to wear to church!  I wore a dress today that I made for Uganda, but I like to wear Maxi dresses in the summer, so I'm sure I'll be wearing it a lot in the next few months.

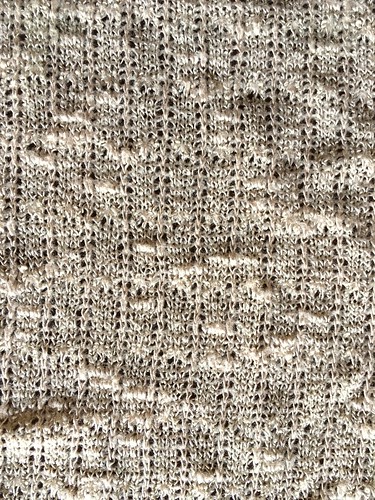
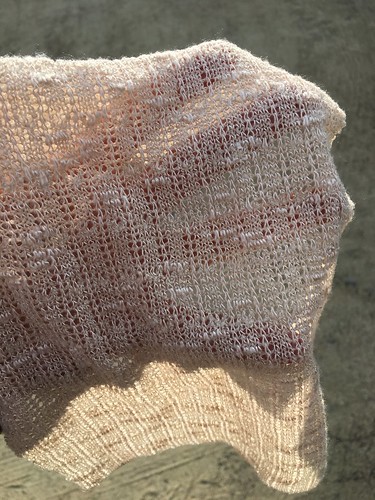
So, in with the new.  A couple of months ago (I think) I planned a spring and summer wardrobe and pulled all the fabrics and patterns.  That's about as far as I got except for one top, The Madagascar Tank.   Well, today I have another Loes Hinse pattern to present - The Bianca Sweater.  I actually did use a sweater knit, too!  This fabric is really light weight and a challenge to work with, but it looks and feels lovely.
Sweater knit for Bianca


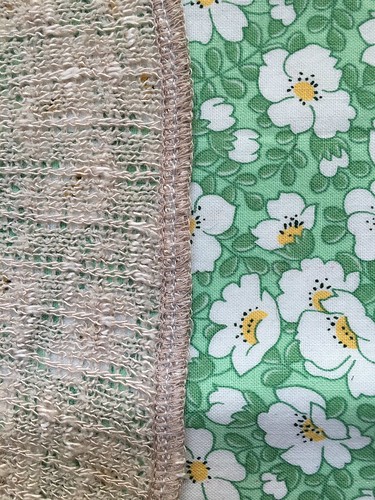
My sewing machine did a really nice job on this fabric, but I knew I would have to serge all the seams.  Most knits do not ravel, but this one just falls apart because the stitches are so loose.  So, I took a few practice runs at what I wanted to do.  Here's what I came up with

Side seams - used 4 thread serger only
Setting in sleeves - basted first, then used 4 thread serger
Hems - I just double serged them with four threads.
Sweater knit for Bianca

My serger is really old and does not have a differential feed.  I probably wouldn't know what to do with it if I had it.  But, I LOVE my serger and it has been a workhorse for me for almost 30 years!  I did not like the look of the double serged hem at the neckline, so after double serging it, I just turned it under and stitched it with a narrow zig zag.  This was a quick and easy top!  I really like the (sort of) deconstructed look of it, yet it still has a good shape and I think will hold up well.


This is the first piece I am making for the Endless Combinations Contest over on PR.  I need to sew the clothes anyway, I have everything ready that fits the contest guidelines, so why not?  Next up - another LH pattern - Ascona pants.