Thursday, March 31, 2016
Bundle of Joy
Last month Fabric Mart Fabrics issued a challenge to use all pieces from one bundle into a garment or collection of garments. I thought it sounded fun to try, so I ordered a small bundle. This is what I got:
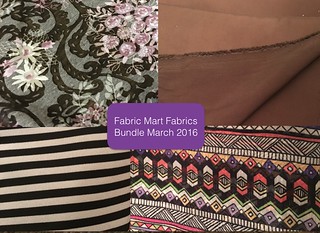
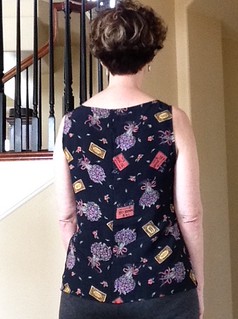
I changed my mind several times about what I would make and what I would have go with each piece. Originally, the brown was going to be a pair of pants, but in the end I decided the fabric might drag against itself. If I were to do it all again, I would probably use the multistripe to do the finishing on the jacket and maybe some trim. Then all of the garments would be one complete outfit. But, I'm glad I made that top separate, as I can see wearing it with other things. I've been wearing it with black pants.
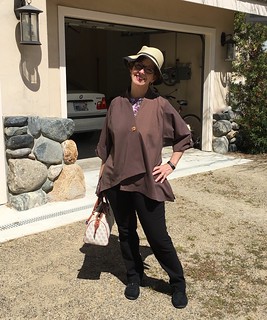
This is what I ended up with! (scroll down for better picture)
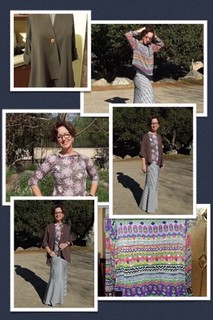
I really like how the garments work together, even though I would not have bought these fabrics to go together. It was a fun challenge to break up my normal sewing routine.
Here are links to more information about each fabric used and the garment:
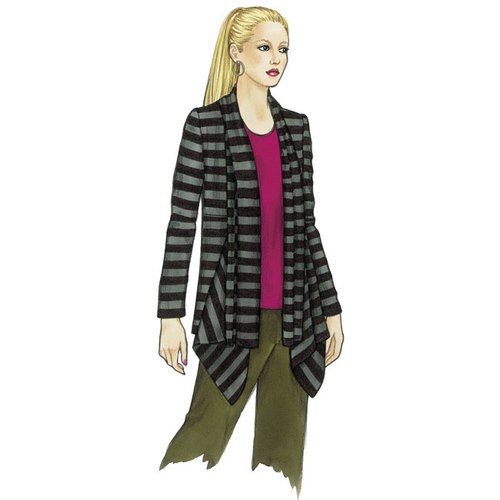
Dark Brown Raincoat fabric - TSW Tremont Jacket
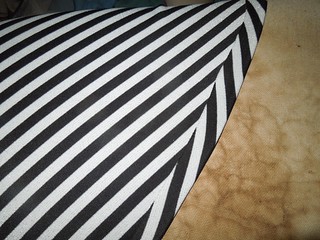
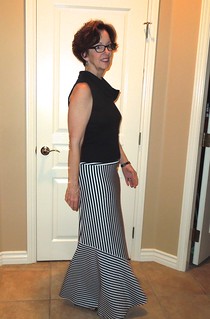
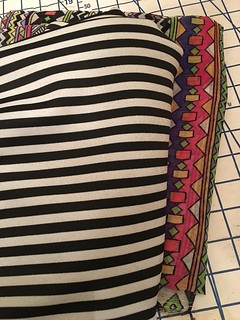
Black and White Stripe - Pattern Review Ina Skirt
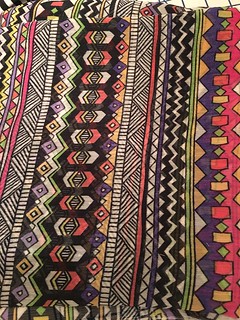
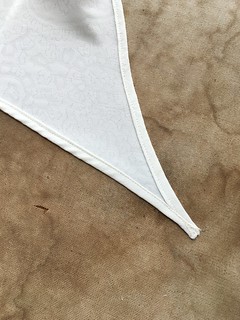
Multi stripe crinkle georgette - Cutting Line Designs Light and Shadow remake
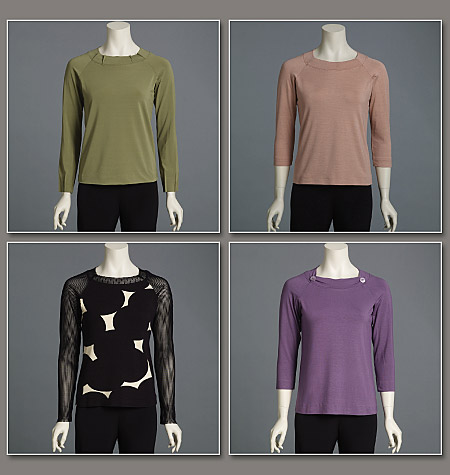
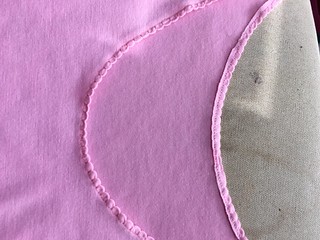
Lavender burnout print knit - Vogue 8636 Marcy Tilton Raglan Tee
I'm not happy with the collage picture above since it is not clear. I tried doing it by making a card in iphoto and then taking a screen shot of the photo. I'm going to try to do it over by using keynote.
Here is a better picture!
Tremont Jacket - TSW
Ta-daa! I finally finished the Sewing Workshop Tremont jacket. I have been working on this thing for several days. Actually, it would be a pretty quick jacket to make if I had serged all of the seam allowances, but I decided to do Mock Hong Kong finish on all of the seams. Several years ago, I purchased a silk tie left-over bundle from FMF. I didn’t realize how great these would be for seam binding until I started using them. Most of the pieces are already on the bias, so it’s pretty easy to line up those strips. I cut the strips 1/25” wide, the stretched them as I pressed them (learned this trick from Lynda Maynard at a PR training). You sew them to the edge of the seam allowance, press toward the edge, then wrap the raw edge and stitch in the ditch. I’m not great at stitching in the ditch, but I still got a nice finish. On some of the seams I needed to trim the excess silk fabric from the underside of the seam allowance.
The one thing this jacket does not have is a pocket. I don’t know why, but I love pockets. Maybe it comes from all of those years of being a teacher and always having too many things in my hands.
This pattern has only 4 pieces. Left front, Right front, Back and Sleeve. The back neckband and facings for front are all cut onto the front. It’s a little bit tricky to sew correctly, but it makes a nice finish.
Another great thing about this pattern is the way the points are finished. It is not easy to get a good finish on uneven corners, but Linda Lee's directions help you to get a nice finish like this:
This fabric did not have a lot of body, so I knew I needed to so something to keep those sleeves up. I cut strips of fabric 2.5" wide and 6 or 7 inches long. Sew up the long edge and press the seam allowance open. Turn the tube so that the seam allowance is in the middle. Do not press, but mark your point. I drew parallel lines 1/4" and 3/4" down from the edge. I then drew from the edge of the seam allowance out to the corners to make the trapezoid shape. I then stitched on the 3 lines that would make the shape. Trim and turn right side out. Make the button hole on the right side and slide over the button. Pull up the sleeve to have the amount of folding you want and trim and hand sew the straight edge of the tab to the inside.
This pattern has a lot of topstitching. If I were using a fabric with a little more body, even a quilting weight cotton, it would be fun to do some decorative stitching. The straight stitch worked well with this fabric.
The fabric I used for this is the last of the FMF bundle I bought earlier this month. I’m not thrilled about the color of this fabric, but I like the way it feels. It is very light weight and probably a rain coat fabric. When I took it out of the washing machine, the water just fell off of it. It has sort of a sueded front to it. I like how this jacket turned out and I'm really happy with all of the pieces that came in my bundle.
Friday, March 25, 2016
Mystery Raglan Tee Vogue 8636
When you order a mystery bundle, you never know what you are going to get. I hadn't ordered one in years, but was prompted by an email I received from Fabric Mart a few weeks ago. I went ahead and ordered the 6 yard bundle for $10.00. I figured that even if I only liked one of the fabrics, I would still come out ahead. Well, this is Fabric #3 out of the bundle, and I love it. I originally was going to make a pair of pants out of piece #4, but changed my mind this morning. This was going to be the top to go with it, but it will still go with many things that I have. The background is gray with a black burnout, but for some reason, it seems to read "brown" so I think it will go with either brown or black.
The pattern I used, Vogue 8636
is a Marcy Tilton from a few years back. I really like the basic raglan T shape. This time I used a tissue knit burnout. Since handling this fabric can be tricky, I decided to share what I did (and didn’t) do.
Since there was nothing that needed to be matched in this fabric, I didn’t use a single layer layout. I folded both selvedges to the middle so that I had two folds, and cut out the front and back on these fold. Then I folded the rest in half and cut out the sleeve and neck pieces. Since I had made the pattern before, this was quick as I had no alterations to make. (Another reason I chose this pattern!)
When I made my Bianca Hack, I also used a tissue knit. I fought this thing on the serger as it kept eating the cut off part into the seam allowance stitching. It was kind of a pain. On this top, I decided to NOT use the serger. At All.
I finally decided to give the Sewing Workshop Sew Confident a try. I started with year 3. One of the lessons in the series is on tricky knits. So, I did learn one thing. Using a double stitched seam and trimming close to the second stitching will give you a flatter seam allowance, stop the curling, and be less bulky than a serged seam. I’m a little bit underwhelmed with the Sew Confident so far, but I have only read about the first 4 lessons. I’m not sure what I was expecting, but we’ll see how it goes. Have any of you tried it? What do / did you think? I have not yet received the 3 patterns that go with that year, but I am anxious to get those (although purchasing the patterns is optional. However, you get 3 for the price of 2, so that’s definitely worth it!)
Another thing I did because of this tissue knit was to use left over tissue paper to start and end my seams. My sewing machine does not have a single needle sole plate, so the tissue tears away easily enough and solves the problem of the fabric being pulled into the feed dogs. I usually use medical exam paper to trace my patterns and I just use left over pieces to do this. I keep them in a little plastic container by my machine.
The two times I made this top before, I used darts in the neckline. This time I used the pleat and button method. I’m pretty happy with the way it turned out.
... And here I am with the requisite tree growing out of the top of my head. (Since I use a tripod and delay switch on my camera to take pictures, I really need to think about this in the future!)
Wednesday, March 23, 2016
PR Ina Maxi Skirt
I have admired the Ina maxi skirt from the first time I saw Deepika wear it last year at the PR conference in LA. Last week I received a mystery bundle with this sparkly black and white stripe, and of course, that Ina skirt came straight to my mind. I had already bought the pattern, so I downloaded that puppy and cut it out. I sewed it together this afternoon to wear it to an event tonight!
This fabric is a little bit spongy and thick. It’s kind of like a ponte, but a lot more stretchy. The pattern calls for 2 yards, but I was able to squeeze it out of 1 and a half. I really like how easily this went together. The pattern is drafted very well and everything just works.
I didn’t really know how I wanted to hem this, and since I was leaving for our event in 15 minutes, I didn’t even want to take time to thread the coverstitch!! I had to cut off 1/2” first. Then I grabbed that 1/2” wide steam a seam and pressed that hem up. done!
Wednesday, March 16, 2016
Wild Print Light and Shadow
I’ve always liked things that are asymmetrical, and clothing is no different. I’ve been inspired by a lot of the layered and asymmetrical designs lately, so I decided to try something different. Also, I recently received a bundle from Fabricmart Fabrics and am trying to make something out of all 4 fabrics. Here are 2 of the fabrics.
With the stripe, I am going to make the Ina Skirt from Pattern Review. This seems to have the sponginess of a scuba knit, the stretch of a jersey, and the weight of a ponte. I have no idea what it is. It does have a little sparkley lurex thread running through the white stripes.
I decided to make a top out of the print that would work with the skirt. I think this fabric is a rayon crinkle. It's kind of sheer like a georgette.
I sewed the inner black top first. I did a baby hem at the bottom, but left the arm holes and neck edge unfinished.
I had drawn a line on the pattern to make the shorter top piece, but I didn’t want to cut my pattern. Instead, I folded out 3 inches on the front and back in order to raise the hemlines. Then I sewed the shoulder and side seams. I basted the neck edge and armholes together, and cut the neck edge down to 1/4” seam allowance. I made a 1.5” strip of bias fabric from the black and folded it in half to make the bias binding for the neck.
This pattern has flat sewn sleeves, but because of the way I was making this, I had to do them as set-in. I was surprised at how much I had to ease in, and after a couple of tries, they worked out beautifully.
I’m really happy with the way this turned out, but I still don’t have the fit down on CLD. When I see the patterns on the models, they always fit beautifully. On me, they are too big in the back, to wide in the shoulders, and they have no darts. I really love the designs though, so I’m determined to get the alterations down. It seems they are really perfect for someone with an apple shape, but I am between a pear and and hourglass. I cut an XS at the shoulder, S at the bust, and M at the hip. I am still needed to narrow the shoulders and back, but I really would like to try this top out of a woven linen.
Wednesday, March 09, 2016
Spring Wardrobe 2016
There is a wardrobe contest over on PR, and I was wanting to join However, since it started last month, and I only have about 6 days available to sew this month (and that’s pushing it) I’m not going to be able to finish. I am inspired though, and am going to sew-along. here is my plan.
Most of these pieces were inspired by the last issue of The Look on the Casual Elegance website. Part of the plan was inspired by the rules of the contest. But now that I'm not going to do the contest, I can do whatever I want. I still like all the pieces I’ve chosen and am anxious to get them made. Spring came here a lot earlier than expected. Also, I really need new clothes and it would be great to have a cohesive grouping to take to the PR weekend in Chicago in May. I’m hoping the weather will be nice there by then.
So far, I only have made the madagascar tank, which I previously blogged. I do have cut out the Ascona pants, Bianca sweater, and camel colored Madagascar. I know how I want to place the lace on this, but I only have a half a yard and will have to piece it. I have not yet figured out where/how I want to do that.
And, here are just a few more pictures from my trip to Uganda. Happy sewing!!
Saturday, March 05, 2016
The Sewing Workshop Ann's Top
A few years ago I bought the Ann's Cardigan and top from The Sewing Workshop. (Well, I probably bought it on Pattern Review)
I bought this pattern to make the cardigan, and I still want to do it. I was looking for a pattern to use a for a high-low tank, and ran across this in my pattern stash. It wasn't what I was looking for, but decided to give it a shot. I had some pink rayon knit that I've never known what to do with, so I used it to try this out.
I probably needed to go down a size in the neckline because it seems a bit shapeless on me. The pattern is designed to have unfinished edges, but I decided to do a shell finish edge on the neckline. My sewing machine has a stitch that does this, so that made it easy.
On this version, I left the tails unfinished, and I like the look.
The whole reason I picked this pattern was because I had something in mind that I wanted to do with a woven. Unfortunately, this took some extra work and the result was not as good as I expected. I turned under the edges twice all the way around and stitched them down.
This top may work with a belt, but it won't work for the combination I had in mind. The fit came out OK, but if I were to do this again in a woven, I would need to do a major sway back alteration, or maybe start the slits up higher. Also, I would like to find a better way to clean finish the edges of those points on the hem. But, with all the sewing projects I have lined up, I don't see that happening. If I make this again, I will stick to a knit.
Madagascar Tank
Last week I made Loes Hinse's Madagascar Tank. I was hesitant to spend $20 on this simple pattern, but I'm glad I did.
Her patterns are just GOOD. This one fit me straight out of the envelope with NO alterations! of course, the drapey fabrics recommended allow for a good fit as well. I have had a few yards of this rayon crepe in my stash for years, so decided to use it. It was perfect. I can see myself making many of these. In fact, I have another cut out already.
This pattern has a CF & CB seamline. neither are straight. This is what adds some of the bust and waist shaping. All seams are serged and the neckline and armholes are just serged, turned under and stitched. Super simple and fast.
Definitely see more of these in my future.